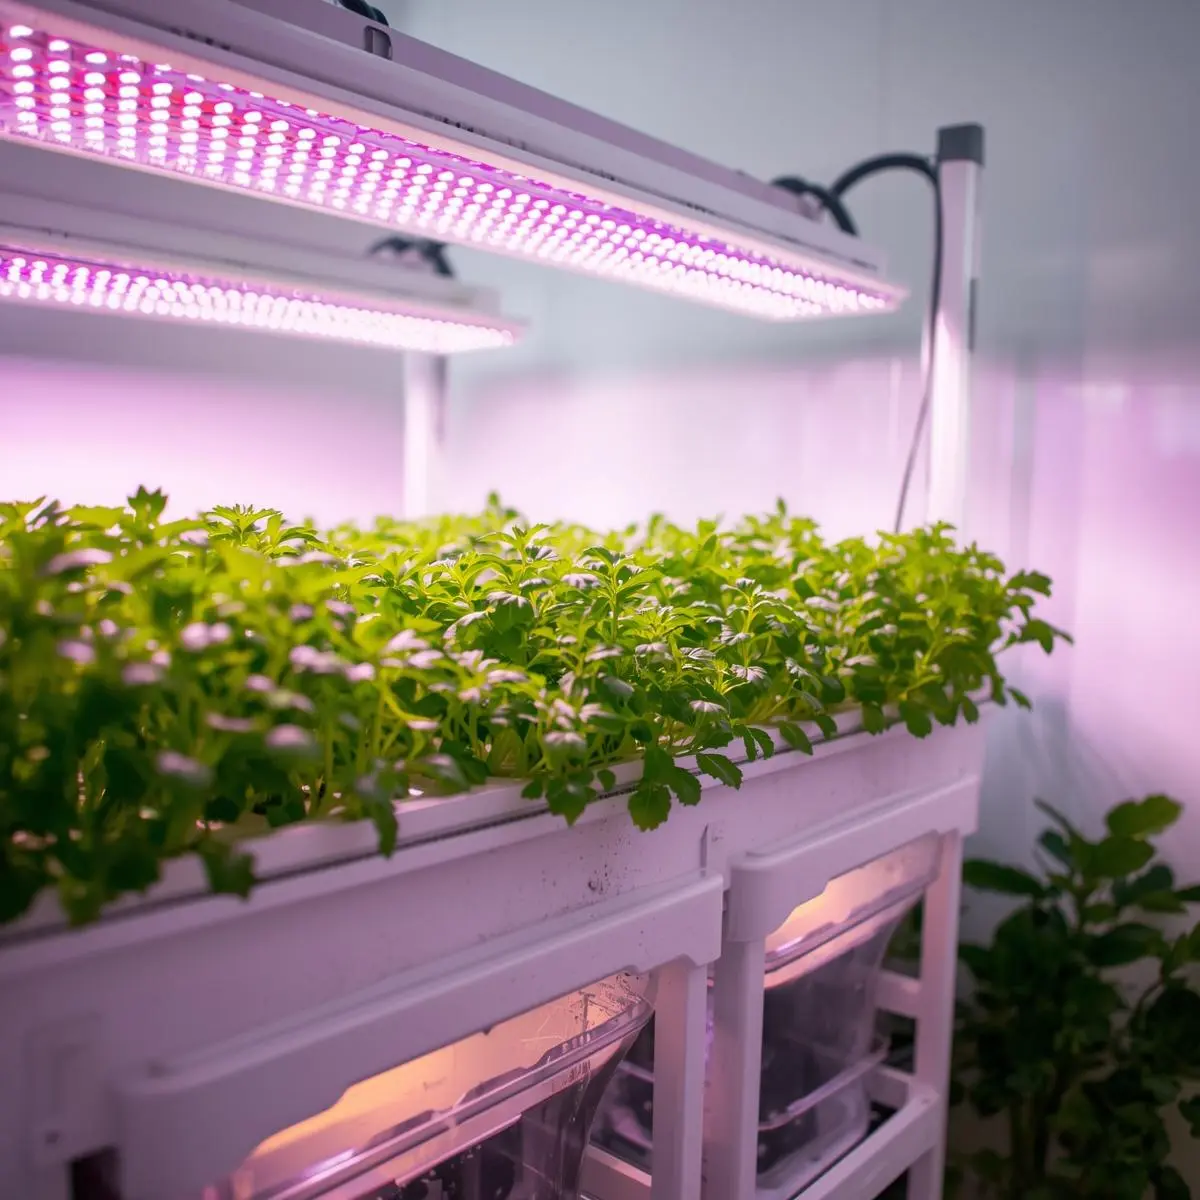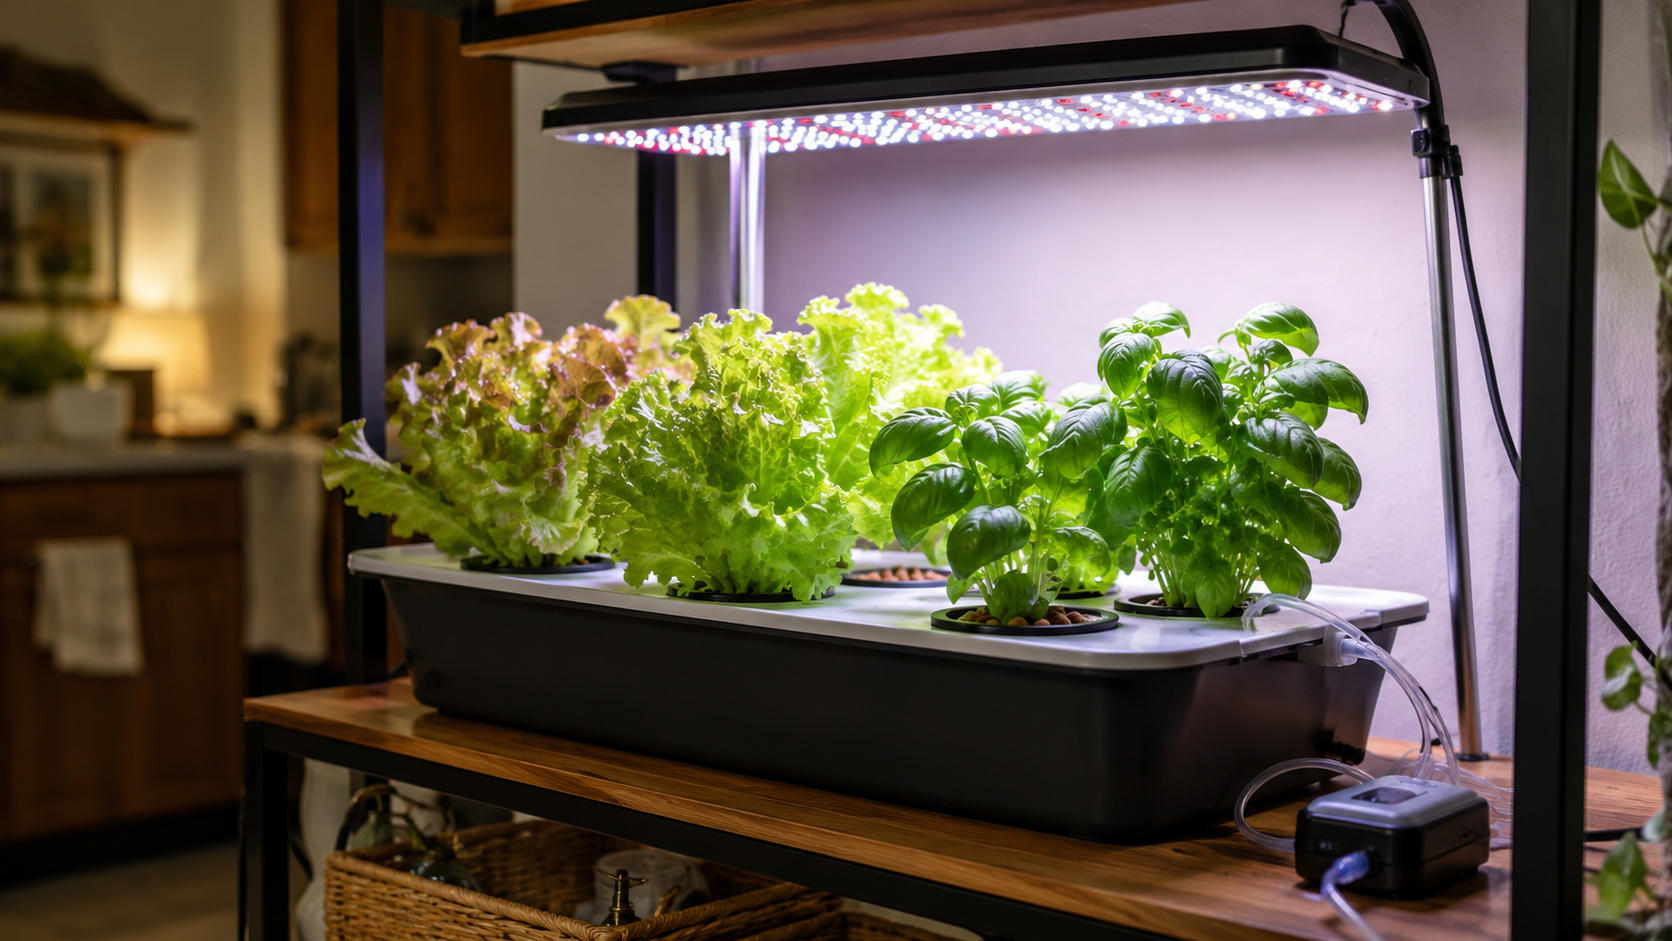
Most beginners don’t fail at hydroponics because they ignore their plants. They fail because nobody told them the three things that actually matter from day one: pH stability, root zone oxygen, and matching their light to what their crop actually needs. Everything else is secondary. Fix those three, and you’ll harvest something. Miss even one of them, and you’ll end up staring at yellowing leaves wondering what went wrong.
At Grow With Hydroponics, we’ve watched thousands of indoor gardeners make the same early mistakes — not from laziness, but from information overload. This guide cuts through that. It’s written for people who want to start growing real food indoors, without spending months decoding conflicting advice from forums.
Hydroponics for beginners means learning to grow plants in nutrient-enriched water instead of soil. It sounds more technical than it is. By the time you finish this guide, you’ll know which system to start with, which crops to grow first, how to mix nutrients, and — critically — what to do when things go sideways.
Quick Answer — At a Glance
Hydroponics is a method of growing plants in water enriched with dissolved nutrients, without any soil. Beginners do best starting with a Deep Water Culture (DWC) or Kratky system, growing lettuce or herbs first. The three variables that matter most from day one are pH (keep it 5.5–6.5), EC/nutrient concentration (start at half-strength), and adequate light (14–16 hours daily for leafy greens). Most beginner setups cost between $50 and $200 to launch and can produce a first harvest within 3–5 weeks.
What Is Hydroponics and Why Does It Work So Well?
Hydroponics is the practice of growing plants in nutrient-enriched water rather than soil. Roots are supported by an inert growing medium — clay pebbles, rockwool, or coco coir — while a carefully mixed nutrient solution supplies everything the plant needs to grow.
The speed advantage is real. Plants grown hydroponically can grow 25–50% faster than their soil-grown counterparts, primarily because roots have direct, constant access to nutrients and oxygen without expending energy searching through soil. According to Penn State Extension, plants require 17 essential nutrients to function properly — in soil, those nutrients are locked in organic matter and released slowly by microbial activity. In hydroponics, they’re delivered directly and immediately.
That’s not a small difference. I’ve grown the same basil variety side by side — one in a pot of decent potting mix, one in a simple DWC bucket — and the hydroponic plant had three times the leaf mass at week six. Same seeds, same light, same temperature. The only variable was how the roots were fed.
How Is Hydroponics Different from Soil Gardening?
The core difference is that you become the soil. In traditional gardening, soil microbes break down organic matter and make nutrients slowly available. In hydroponics, you mix those nutrients directly into water and deliver them to the root zone. There’s no buffer — which is why pH and nutrient concentration matter so much more than they would in a pot of compost.
This is also why beginners sometimes get in trouble. Soil forgives a lot. Hydroponics doesn’t. But once you understand what you’re managing — and it’s really only a handful of variables — the system is actually easier to control than a garden bed that’s dealing with insects, slugs, compaction, drainage problems, and unpredictable rainfall.
Does Hydroponics Actually Use Less Water?
Yes, significantly. Well-managed recirculating hydroponic systems use up to 90% less water than conventional soil gardening because the same nutrient solution is reused rather than draining away. For apartment growers or anyone in a water-scarce region, this isn’t a trivial benefit — it’s one of the main reasons CEA (controlled environment agriculture) has grown so rapidly in the last decade.
Choosing the Best Hydroponic System for Hydroponics Beginners
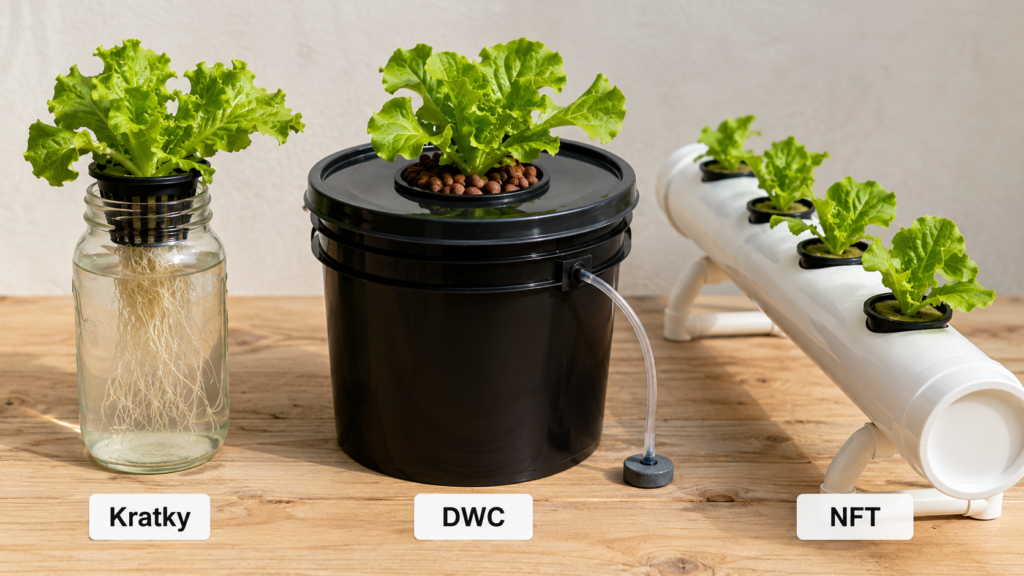
The right starting system is the one you’ll actually maintain. Complexity is the enemy at the beginning. Three systems work well for hydroponics beginners — each has a slightly different setup requirement and growth profile.
Kratky Method — Truly Set-and-Forget
The Kratky method is the simplest form of hydroponics that exists. No pumps, no electricity, no timers. You fill a container with nutrient solution, set a seedling in a net pot above the waterline, and let physics do the rest.
Here’s how it works: as the plant drinks and transpires, the water level drops naturally, creating an air gap. The roots above the gap access oxygen directly, while the submerged roots continue feeding on the nutrient solution. As long as the plant can grow fast enough to keep pace with the dropping water level, it thrives.
I’ve grown entire heads of romaine lettuce in Mason jars using this method. Fill it once, plant a seedling, come back in three weeks to harvest. For someone who just wants to see if hydroponics works before committing to equipment, this is the perfect starting point. Costs under $10 to build.
Best for: Lettuce, spinach, herbs in small quantities. Not ideal for large or fruiting plants.
Deep Water Culture (DWC) — Best First “Real” System
DWC is where most serious beginners land, and for good reason. Plants sit in net pots in an opaque reservoir, with roots dangling into oxygenated nutrient solution. An air pump and air stone keep the water bubbling — and that oxygen is what drives the notably fast growth DWC is known for.
The UF/IFAS Extension notes that DWC is “easy to set up and operate; ideal for beginners” with “consistent nutrient uptake that leads to fast growth” and “minimal moving parts with fewer mechanical failures.” Those are the exact qualities a beginner needs.
A complete DWC setup — 5-gallon bucket, lid with net cup holes, air pump, tubing, air stone, clay pebbles — costs around $25–40 to build yourself, or you can buy a complete kit for around $60–100. It’s the workhorse of home hydroponics.
Best for: Lettuce, basil, kale, spinach, mint. Works for tomatoes and peppers too, but requires more management.
Wick System — Ultra-Simple, Ultra-Passive
The wick system uses capillary action to draw nutrient solution upward from a reservoir into the growing medium, then to the roots. There’s no pump, no electricity, nothing to fail. A nylon cord or piece of felt does the work.
Honestly, it’s more limited than DWC or Kratky — water delivery is slow, and thirsty plants can outpace the wick. But for growing mint, chives, or parsley on a windowsill without any equipment, it’s hard to beat. I keep one on my office desk. Two-year-old mint plant. Still going.
Best for: Small herbs, succulents, low-demand plants. Not suitable for fast-growing crops or anything with significant water demands.
Nutrient Film Technique (NFT) — When You’re Ready to Scale
NFT is the step up from DWC. A thin film of nutrient solution flows continuously down sloped channels over the plant roots. It’s efficient, scalable, and used commercially for enormous leafy green production. But it requires more setup, and pump failure risks drying roots quickly—which is stressful for beginners who aren’t yet checking their systems daily.
Save NFT for your second or third system. Learn the basics on Kratky or DWC first. For a deeper look at all your options, the complete Hydroponic System Guides on Grow With Hydroponics cover every setup type with detailed build instructions and crop compatibility charts.
System | Difficulty | Electricity Needed | Best Crops | Avg. Setup Cost | Time to First Harvest |
Kratky Method | ⭐ Easiest | No | Lettuce, herbs | Under $10 | 3–4 weeks |
Wick System | ⭐ Easiest | No | Small herbs | $5–$15 | 4–6 weeks |
Deep Water Culture | ⭐⭐ Easy | Yes (air pump) | Lettuce, herbs, basil | $25–$100 | 3–5 weeks |
NFT | ⭐⭐⭐ Intermediate | Yes (pump) | Leafy greens, herbs | $80–$200+ | 3–5 weeks |
Ebb & Flow | ⭐⭐⭐ Intermediate | Yes (pump + timer) | Mixed crops, fruiting | $100–$300+ | 5–8 weeks |
Top-Rated Beginner Hydroponic Kits
Ready to pick a system? These are the kits we recommend most often for first-time growers — balanced setups that won’t overwhelm you but will actually produce results. We’ve filtered for quality, ease of setup, and value.


Essential Hydroponics for Beginners Equipment: What You Actually Need
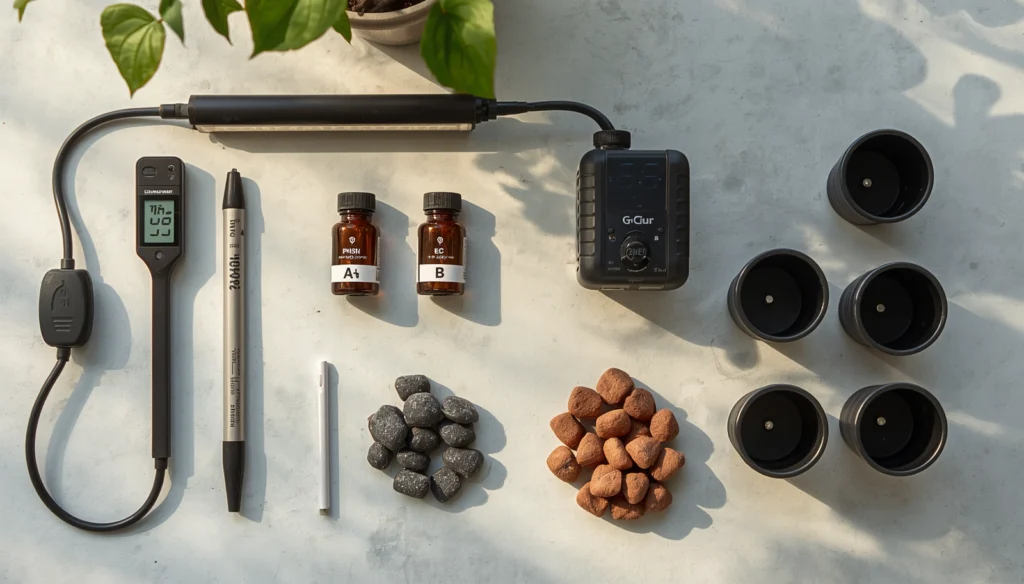
You don’t need much to start. The intimidation around hydroponics equipment usually comes from seeing professional setups on YouTube. Your first system needs five things: a way to hold water, something to support the plant, nutrients, light, and a pH meter.
Grow Lights for Hydroponics Beginners
Unless your growing space gets 6+ hours of direct, intense sunlight daily, you need a grow light. For most indoor spaces, this means full-spectrum LEDs.
Here’s the mistake I see constantly: someone buys a light that claims 1000W but actually draws 100W from the wall, hangs it 3 feet above their seedlings, and wonders why everything stretches into spindly, pale stems. Light intensity drops off exponentially with distance. A 100W LED at 24 inches delivers far less to the plant than the same light at 12 inches.
For leafy greens, a lighting schedule of 14–16 hours on, 8–10 hours off works well. Use the free DLI Calculator to confirm you’re hitting the right daily light integral for what you’re growing — it takes the guesswork out of how long to run your light at a given intensity.
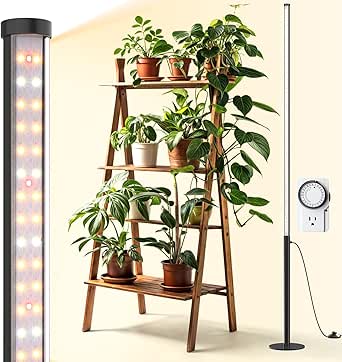
Full-Spectrum LED Grow Lights for Indoor Hydroponics
Not all LEDs are equal. These are the full-spectrum options that consistently perform for leafy greens and herbs — with honest wattage draw (not inflated equivalency numbers) and the right spectrum coverage for indoor growing.


Nutrient Solutions for Hydroponic Beginners
Your plants will receive 100% of their nutrition from the solution you mix. There’s no soil buffer, no organic matter to fall back on. This is where beginners either get it right quickly or spend weeks troubleshooting problems that all trace back to incorrect nutrient concentration.
A quality hydroponic nutrient solution needs to supply all 17 essential nutrients plants require—nitrogen, phosphorus, and potassium (the macro trio), plus calcium, magnesium, sulfur, and a range of micronutrients including iron, manganese, zinc, and boron.
For beginners growing leafy greens and herbs, a one-part liquid nutrient formula is the right call. There’s nothing to mix incorrectly, the ratios are pre-balanced, and the cost difference between one-part and two- or three-part systems is negligible at small reservoir volumes. For fruiting crops, you’ll eventually want a two- or three-part system so you can shift the phosphorus-to-potassium ratio when plants move from vegetative growth into flowering.
Starting EC (electrical conductivity) recommendations:
- Seedlings and early transplants: EC 0.5–0.8
- Leafy greens (lettuce, spinach, herbs): EC 0.8–1.6
- Fruiting crops (tomatoes, peppers): EC 2.0–3.5
Start at the lower end of any range. Plants in hydro that are slightly underfed look fine and catch up quickly. Plants that are overfed show tip burn and root damage within days.
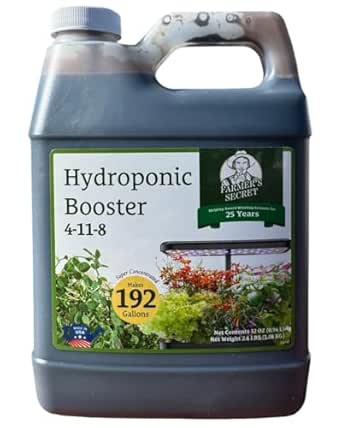
Recommended Hydroponic Nutrients for Beginners
Choosing the right nutrient formula makes the first grow significantly easier. These are the products that deliver clean, consistent results without the complicated mixing schedules.




Tip: Use our free Hydroponic Nutrient Calculator to dial in exact mixing ratios for your system size.
pH Management — The Variable That Controls Everything Else
pH is the single most important variable in hydroponics, and it’s the one most beginners underestimate. pH is a measure of hydrogen ion concentration in your solution on a 0–14 scale. According to Missouri University Extension, the optimal pH range for most hydroponic vegetables is 5.5–6.5. Outside that window, nutrients become chemically unavailable to roots — a condition called nutrient lockout — even when the solution is perfectly mixed.
EC, or electrical conductivity, measures how concentrated your nutrient solution is. Higher EC = more dissolved nutrients. But higher doesn’t mean better. If your reservoir level drops while EC rises, it means the plant is drinking water faster than nutrients. The solution is becoming more concentrated. Top it off with plain water, not more nutrient mix.
Buy a decent digital pH pen and an EC/TDS meter before you do anything else. Cheap ones work fine — just calibrate them before first use and keep the pH pen in storage solution when not in use. Avoid pH test strips in nutrient solutions; the dyes in fertilizers interfere with accurate color readings.
Best Plants to Grow for Hydroponics Beginners
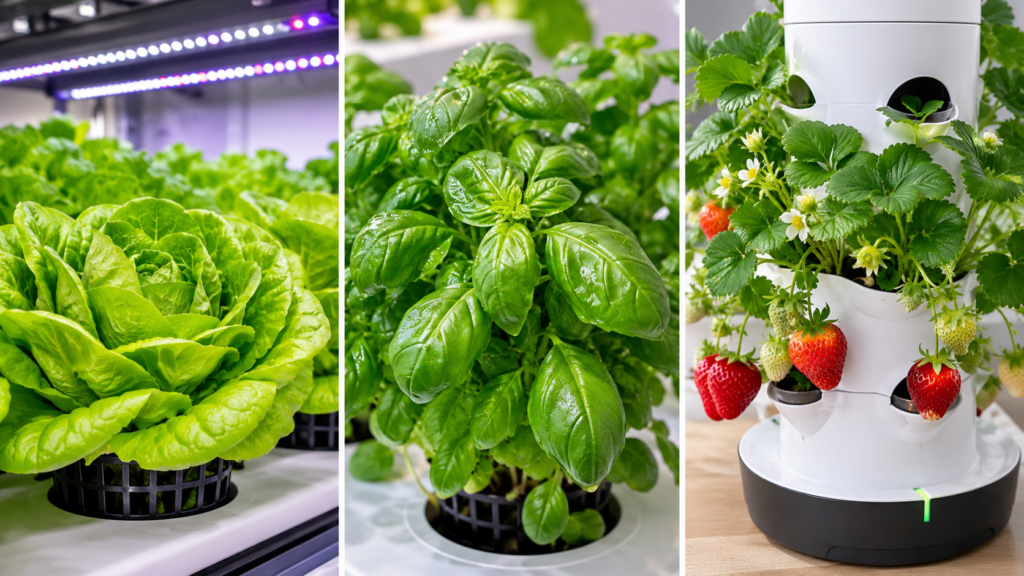
Starting with the right crops is half the battle. These are fast-growing, forgiving, and genuinely useful to harvest. They’ll give you early wins and teach you how your system behaves before you try anything more demanding.
Leafy Greens — Fastest Path to First Harvest
Leafy greens are the single best starting crop for beginners. They grow fast, tolerate minor pH drift and nutrient imbalances better than fruiting plants, and don’t need intense light. Most go from seed to harvest in 3–5 weeks.
Best starter leafy greens:
- Butterhead or loose-leaf lettuce — forgiving, quick, endlessly harvestable if you use the cut-and-come-again method
- Spinach — slightly slower than lettuce but highly productive and cold-tolerant
- Kale — robust, tolerates fluctuating EC better than most crops
- Arugula — grows quickly and has a strong flavour that makes harvests feel rewarding
Lettuce in particular is near-foolproof in a Kratky or DWC setup. That’s why it’s the crop every beginner guide recommends. It’s not laziness — it’s genuinely the kindest starting point.
Herbs — The Kitchen Gardener’s Choice
Culinary herbs thrive hydroponically and often grow more vigorously than in soil. They’re also immediately useful — there’s something deeply satisfying about clipping basil for dinner that you grew in a jar of water on your kitchen counter.
Herbs that perform especially well hydroponically:
- Basil — grows extremely fast in DWC; Genovese is reliable, Thai is slightly slower but aromatic
- Mint — grows aggressively, best kept in its own container
- Cilantro — quick to harvest; succession-plant every 2–3 weeks for continuous supply
- Parsley and chives — slower to establish but reliable and long-lasting
For a detailed walkthrough on growing a productive kitchen herb system from scratch, the guide on building a DIY hydroponic herb garden covers setup, spacing, and maintenance in practical detail.
Strawberries and Microgreens
Strawberries are more work than lettuce, but not dramatically so — and the results are worth it. No soil contact means cleaner fruit, fewer fungal issues, and a more compact plant that fits vertical and tower systems well. Use day-neutral varieties rather than seasonal ones for continuous production.
Microgreens deserve a mention too. They’re technically not a hydroponic system on their own — they’re grown on a growing medium — but they can absolutely be grown indoors without soil and represent one of the fastest paths to a harvest (7–14 days). If you want something on the table while your DWC lettuce is still in week two, start a tray of radish or sunflower microgreens.
Understanding pH and EC: The Two Numbers That Run Your System
These two readings are where beginner hydroponics either succeeds or falls apart. The good news is they’re not complicated once you understand what each one actually does.
Why pH Controls Nutrient Availability
pH affects which nutrients are chemically available to plant roots. According to Penn State Extension research, even slight pH drift outside the 5.5–6.5 range starts locking out specific nutrients. For example, iron, manganese, and zinc become increasingly unavailable above pH 6.5. Calcium and magnesium can become less available below pH 5.5.
The frustrating part: your plant can look like it has a nutrient deficiency — yellowing between leaf veins, pale new growth — when the solution is perfectly mixed and the problem is entirely pH. This is one of the most common misdiagnoses beginners make. They add more nutrients to a deficiency that’s actually a lockout, drive the EC up, and make things worse.
Check pH daily in the first few weeks. In a small reservoir, pH can drift significantly within 24–48 hours, especially when plants are actively growing.
How to Read EC as a Feeding Signal
EC (electrical conductivity) measures how many dissolved salts are in your solution. It’s the closest thing to a “feeding strength” reading you have. You need an EC/TDS pen to measure it — don’t try to manage nutrient concentration by guessing.
As Urban Harvest Lab explains simply: “EC helps you avoid feeding too weakly or too strongly.” If your reservoir level drops but EC stays the same or rises, the plant is drinking water without absorbing proportional nutrients. Top off with plain pH-adjusted water. If EC drops and the reservoir level also drops, the plant is consuming both water and nutrients proportionally — add a dilute nutrient solution to top up.
For a deeper look at how EC and PPM measurements relate, the complete guide on why EC matters in hydroponics explains the practical side clearly, including which PPM conversion scale to use and how to interpret your meter’s readings correctly.
Common Mistakes in Hydroponics for Beginners (And How to Fix Them)
Most beginners make the same handful of mistakes. None of them are fatal — but catching them early saves a lot of frustration and a lot of dead lettuce.
Overfeeding Nutrients at the Start
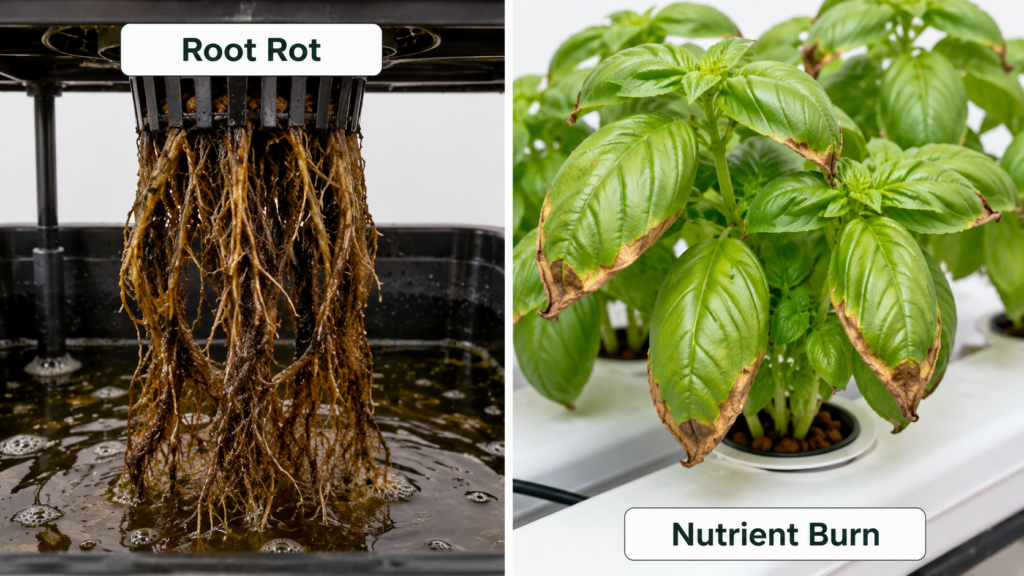
More is not better. This is probably the single most common error in beginner hydroponics. High nutrient concentration causes tip burn within days — the leaf edges turn brown and crispy, starting at the tips and moving inward. Severe overfeeding damages roots directly.
Start at half the recommended dosage for the first week. Your plants will look fine, maybe even healthier, because they’re not stressed by excess salts. Gradually work up to the full recommended rate as you gain confidence reading your plants.
Ignoring Root Zone Oxygen
Roots need oxygen just as much as leaves need light. In soil, air pockets naturally form between particles. In hydroponics, you have to provide that oxygen through aeration. In a DWC system, if the air pump stops running — even for 24 hours in warm conditions — roots can begin to suffocate and root rot pathogens (usually Pythium species) move in fast.
Root rot smells unmistakable. It’s that slightly foul, swampy smell coming from the reservoir, and when you look at the roots, they’re brown, slimy, and falling apart instead of white and firm. Prevention is simple: keep the air pump running continuously, keep the reservoir temperature between 64–72°F (18–22°C), and use an opaque reservoir to block light.
Letting pH Drift Without Checking
A pH pen sitting in a drawer helps nobody. Invest five minutes a day in the first few weeks checking and adjusting pH. It takes maybe 10–15 minutes once you have a routine. Most systems need minor adjustment every 1–2 days — a few drops of pH Up or pH Down solution is usually all it takes to bring things back into range.
Choosing the Wrong Starting Crop
Tomatoes and peppers are not beginner crops. They need intense light, significantly higher EC than leafy greens, larger containers, support structures, and more complex nutrition management through their growth stages. I’ve seen beginners fail completely with tomatoes and conclude that hydroponics doesn’t work — when the real issue was starting with the hardest crop on the list. Start with lettuce or basil. Get a few successful harvests under your belt. Then step up to fruiting plants.
Poor Water Quality from the Start
Tap water works in most areas, but you need to know what’s in it. Very hard water — high in calcium, magnesium, and bicarbonates — can already contain enough mineral content to interfere with your nutrient formula, especially if the baseline EC is already 0.4–0.6 before you add anything. Let tap water sit out 24 hours to off-gas chlorine, or use a dechlorinator. If your tap water is extremely hard, blend it 50/50 with reverse osmosis or distilled water to bring the baseline EC down before mixing nutrients.
Setting Up Your First Hydroponics System — Step by Step
These steps are written for a basic DWC setup, which is the recommended first system for most beginners.
What you need:
- Opaque 5-gallon bucket with lid (food-grade)
- 3-inch net pots (2–3 per bucket)
- Air pump, airline tubing, air stone
- Clay pebbles as growing medium
- Hydroponic nutrient solution
- pH meter and EC/TDS pen
- pH Up and pH Down solution
- Seedlings or seeds in rockwool starter cubes
Step 1: Drill holes in the lid sized to snugly fit your net cups. Two or three plants per 5-gallon bucket is plenty — overcrowding is a common mistake.
Step 2: Rinse clay pebbles thoroughly—they’re dusty from the factory and that dust will cloud your reservoir and affect pH.
Step 3: Fill the reservoir to about 1 inch below the bottom of the net cups. You don’t want roots in the solution yet — the initial gap encourages them to search downward.
Step 4: Mix your nutrient solution according to package directions, starting at half strength. Add pH adjuster to bring the solution to 5.8–6.2 and check with your meter.
Step 5: Set the air stone in the reservoir, run tubing through a small hole in the lid or side, and connect to the air pump outside the reservoir. Turn it on — you should see a steady stream of bubbles.
Step 6: Place seedlings (in their starter cubes) into net cups packed with clay pebbles to hold them upright. Position under your grow light.
Step 7: Check pH and reservoir level daily for the first week. Top off with pH-adjusted plain water as levels drop. Change the full nutrient solution every 7–14 days.
That’s it. The hardest part of a first DWC setup is fighting the urge to overcomplicate it.
Advanced Tips for Hydroponics Beginners Ready to Level Up
Once you’ve got a successful harvest or two behind you, a few small improvements can meaningfully increase both yield and plant health.
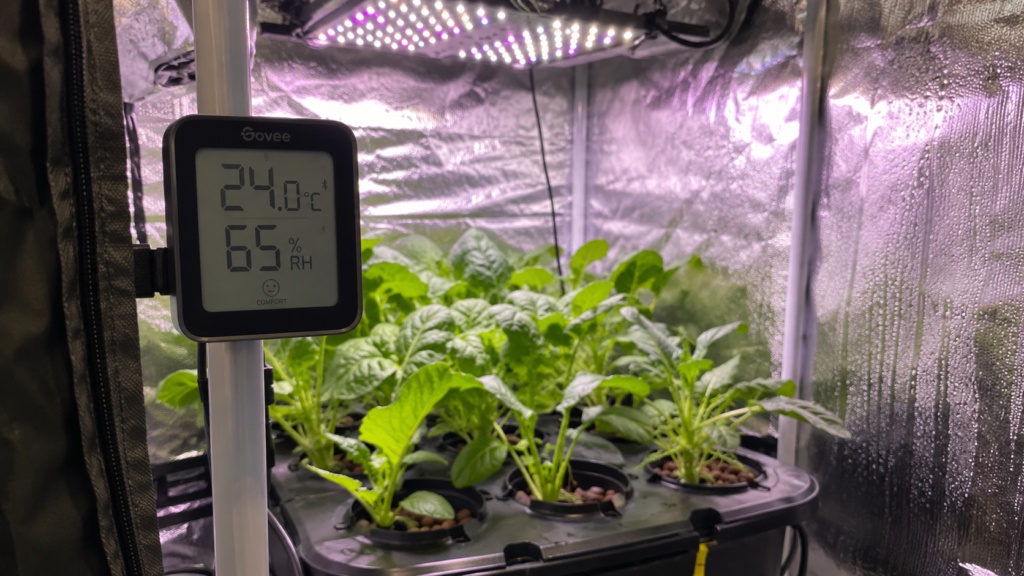
Monitor Temperature and Humidity Together (VPD)
VPD — vapor pressure deficit — is the relationship between air temperature and relative humidity as it affects how plants transpire. It sounds academic. In practice, it’s one of the most useful concepts in indoor growing.
When VPD is too low (high humidity, cooler temps), plants transpire slowly. Nutrient movement through the plant slows down. Growth stalls. When VPD is too high (hot, dry conditions), plants close their stomata to conserve water and essentially stop growing efficiently.
The ideal VPD range for most leafy greens in vegetative growth is 0.8–1.2 kPa. For herbs and young fruiting plants, 0.8–1.5 kPa. Use a temperature/humidity sensor in your growing area and cross-reference with a VPD chart to see where your environment sits and whether an adjustment would help.
Change Nutrients on a Schedule, Not Just When Problems Appear
Even if your EC reading looks stable, a nutrient solution that hasn’t been changed in 3 weeks has an increasingly imbalanced mineral profile. Plants take up different nutrients at different rates — so after two weeks, you might have plenty of potassium but depleted calcium, even though overall EC looks fine. Change the full reservoir every 1–2 weeks. It costs almost nothing and prevents most of the slow-burn deficiency problems beginners struggle to diagnose.
Plan Your Grow Space Before Expanding
Before adding a second system or more plants, think through spacing and light coverage carefully. Overcrowded plants block each other’s light, restrict airflow, and breed the humid conditions that fungal problems love. A proper layout means better yield from fewer plants.
The Hydroponic Nutrient Calculator on Grow With Hydroponics helps you dial in exact nutrient amounts for your system size and growth stage, so you’re not guessing at mixing ratios or scaling recipes incorrectly.
Is Hydroponics Worth It for a Complete Beginner?
Yes — with a realistic expectation of the learning curve. The first few weeks involve learning a new set of observations: what healthy roots look like, how fast your reservoir depletes, how your specific tap water behaves, how your plants respond to light intensity. That’s not complicated, but it does take attention.
The payoff comes quickly. A simple Kratky lettuce setup costs $10 and produces its first harvest in under a month. A proper DWC system with a grow light costs $100–200 to set up and runs for years. After the first 3–4 successful growing cycles, most people have fully internalised the pH-EC-light rhythm and growing becomes genuinely low-effort.
Honest advantages:
- 30–50% faster growth compared to soil-grown plants under equivalent conditions
- Up to 90% less water used in recirculating systems versus soil irrigation
- No soil pests, no fungus gnats breeding in growing medium, no muddy containers
- Year-round production regardless of outdoor season or climate
- Compact systems that fit apartments, kitchens, spare rooms, and balconies
Honest challenges:
- pH and EC management require attention, especially in the first month
- Equipment failures (a dead air pump) can affect plants quickly
- Higher upfront cost than a packet of seeds and a pot of dirt
The equipment challenges are manageable. Buy a backup air pump — they cost $8 — and you’ve eliminated the main failure risk. Most of the other challenges dissolve with experience.
FAQ: Hydroponics for Beginners
How much does a beginner hydroponic system cost?
A Kratky system costs under $10 to build from mason jars and net cups. A complete DWC setup with grow light starts around $100–150. Countertop all-in-one plug-and-play systems range from $150–$400 depending on size and features.
What is the easiest plant to grow hydroponically as a beginner?
Lettuce is the easiest crop for hydroponic beginners. It grows quickly (3–4 weeks from seedling to harvest), tolerates minor pH fluctuations better than most crops, doesn’t need intense light, and can be cut-and-come-again harvested rather than pulled all at once.
How often do I need to change the nutrient solution in hydroponics?
Change the full nutrient solution every 1–2 weeks. Between changes, top off the reservoir with plain pH-adjusted water as levels drop. Changing on a consistent schedule prevents the gradual nutrient imbalances that cause subtle deficiency symptoms even when EC looks normal.
Do I need special water for hydroponics?
Tap water works in most regions. Let it sit out 24 hours to off-gas chlorine before use. If your tap water is very hard (above 200 PPM background mineral content), blend it with reverse osmosis or distilled water to avoid mineral imbalances in your nutrient solution. Always check baseline EC before adding nutrients.
Can I grow tomatoes and peppers hydroponically as a beginner?
You can, but they’re not the best starting crop. Fruiting plants need more intense light, larger containers, higher EC, physical support structures, and more complex nutrient management through their growth stages. Master lettuce and herbs through 2–3 successful cycles first, then step up to fruiting plants with that experience behind you.
Your First Hydroponic Harvest Is Closer Than You Think
Hydroponics for beginners doesn’t require perfect conditions, expensive equipment, or agricultural science knowledge. It requires consistency, attention to three core variables — pH, nutrient concentration, and light — and a willingness to start simple and build experience from there.
Start with a Kratky jar of lettuce. Or a DWC bucket of basil. Something small enough that mistakes cost very little and wins arrive quickly. The first time you pull a head of lettuce you grew in water and eat it that evening, the whole system clicks into place in a way that reading about it never quite achieves.
Keep learning, keep adjusting, and don’t overcomplicate the early stages. The resources, tools, guides, and calculators available at Grow With Hydroponics are built specifically to help indoor growers make smarter decisions at every stage — from first Kratky jar to multi-system grow rooms. Everything you need to improve your next cycle is there when you’re ready for it.