


Most beginners don’t fail because they bought the wrong tent. They fail because they set up a perfectly decent tent and then ignored half the variables inside it—temperature swings overnight, humidity creeping up toward mould territory, a grow light hung four inches too high. The tent didn’t let them down. The environment did.
Here at Grow With Hydroponics, we’ve seen this pattern repeat constantly. Someone invests in a solid indoor grow tent, seeds it with herbs or lettuce, and then watches the setup underperform because no one told them how interconnected light, airflow, and humidity really are. This guide fixes that. By the end, you’ll understand not just what to put inside your tent, but why each component matters and how they work together to create a stable, productive growing environment—whether you’re a first-timer with a 2×2 or upgrading to a 4×4 hydroponic system.
What Is an Indoor Grow Tent, Really?
A grow tent is a portable, enclosed structure with a reflective interior lining, ducting ports, and structural hanging bars—purpose-built to house grow lights, ventilation, and plants in a single controlled space. That’s the technical version.
The practical version: it’s your own miniature growing climate. Outside the tent, your room might be 18°C in winter and 28°C in summer. Inside a properly dialed-in tent, your plants live in a consistent 22–26°C bubble, 365 days a year, indifferent to whatever the weather is doing outside.
That’s what makes indoor grow tents so valuable — not just the convenience, but the control. For hydroponic growers especially, control is yield. When your plant gets the right light intensity, the right air exchange rate, and the right humidity at each stage of growth, it doesn’t waste energy adapting. It just grows.
The outer shell of a quality tent is made from woven fabric rated in denier (D)—a measurement of thread density. Entry-level tents use 210D–600D fabric, while premium options from brands like Gorilla Grow Tent or AC Infinity use 1680D–2000D canvas. The inner lining is typically Mylar—a highly reflective polyester film that bounces light back toward the canopy instead of absorbing it. Most tents advertise 95–98% reflectivity, and the difference between a tight reflective interior and a cheap loose one is measurable at the plant canopy.
Why Grow Tent Size Matters More Than You Think
The most common sizing mistake is going too small and then buying a bigger tent six months later. The second most common mistake is going too big and then struggling to dial in conditions in a tent that outgrows your equipment.
Here’s a practical framework:
- 2×2 ft (0.4 m²): Ideal for propagation, seedlings, or a small herb garden. Supports 1–3 plants. Very easy to manage — a single fan and a modest LED keep everything stable.
- 3×3 ft (0.9 m²): The sweet spot for most beginners. Enough room for 4–6 plants or a compact NFT/DWC system. One decent LED and a 4-inch inline fan handle it comfortably.
- 4×4 ft (1.6 m²): The most popular size for intermediate growers. Supports mixed crops, fits most ready-made hydroponic systems, and gives you enough room to train plants without feeling cramped. Needs a 6-inch inline fan and 400–600W of actual LED draw.
- 5×5 ft and above: For dedicated spaces — a spare room corner or garage setup. Multiple hydroponic systems can run side-by-side, and you’ll want environment controllers to manage the extra volume.
Height is just as important as footprint. Tall-growing crops like tomatoes, cucumbers, and peppers need vertical clearance — a tent with a 1.6m (5.2 ft) ceiling will frustrate you by week eight if you’re growing indeterminate tomatoes. Aim for at least 2m (6.5 ft) for fruiting plants, and look for tents with height extension kits if you’re not sure how tall your crop will get.
Indoor Grow Tent Lighting: Getting Light Right From Day One
Light is the single variable with the most impact on yield inside an indoor grow tent, and it’s also where most beginners make their most expensive early mistakes.
What Type of Grow Light Should You Use?
Full-spectrum LED grow lights are the standard choice for home and hobbyist growers—and for good reason. They run cooler than HPS or CMH fixtures, last longer, and modern quantum board LEDs deliver far more usable light per watt than older blurple-panel designs.
When sizing a light, target 30–40 watts of actual draw per square foot for high-light crops like tomatoes, peppers, and fruiting plants. For leafy greens, herbs, and lettuce, 20–25 watts per square foot is sufficient. A 3×3 tent growing lettuce needs roughly 200W of real draw. The same tent growing peppers needs closer to 300 W.
One critical note: ignore “equivalent” wattage claims. A light marketed as “1000W equivalent” may pull only 150–200W from the wall. Always check the actual power draw, and where possible, look for the manufacturer’s PPFD map—which shows the real light intensity at various heights above the canopy.
Always check the actual power draw, and where possible, look for the manufacturer’s PPFD map—which shows the real light intensity at various heights above the canopy. If you’re still comparing fixtures, our guide to the best LED grow lights for indoor gardens breaks down the top options by tent size and budget.
Hang Height and Light Burn
Place a full-spectrum LED 12–24 inches above the canopy as a starting point, then adjust based on what you observe. If seedlings stretch upward in the first week — thin stems, wide internodal spacing — your light is too far away. If leaf margins start to bleach or curl, it’s too close.
A simple rule: hang higher during propagation and seedling stages, lower once the plant reaches vigorous vegetative growth. Many quality LEDs now include dimming controls, which let you run at lower intensity (and lower heat) during early stages without repositioning the fixture.
Indoor Grow Tent Ventilation: The Variable Most Beginners Underestimate
Temperature and humidity don’t manage themselves inside a sealed tent. They build—and without proper airflow, a tent that looks fine at noon can be a 32°C, 85% RH heat trap by 2 PM.
How to Size a Ventilation System
The standard recommendation is to exchange the full air volume of your tent once per minute. To calculate the minimum fan capacity you need:
- Multiply tent length × width × height in feet to get cubic feet.
- That number is your minimum CFM (cubic feet per minute) rating.
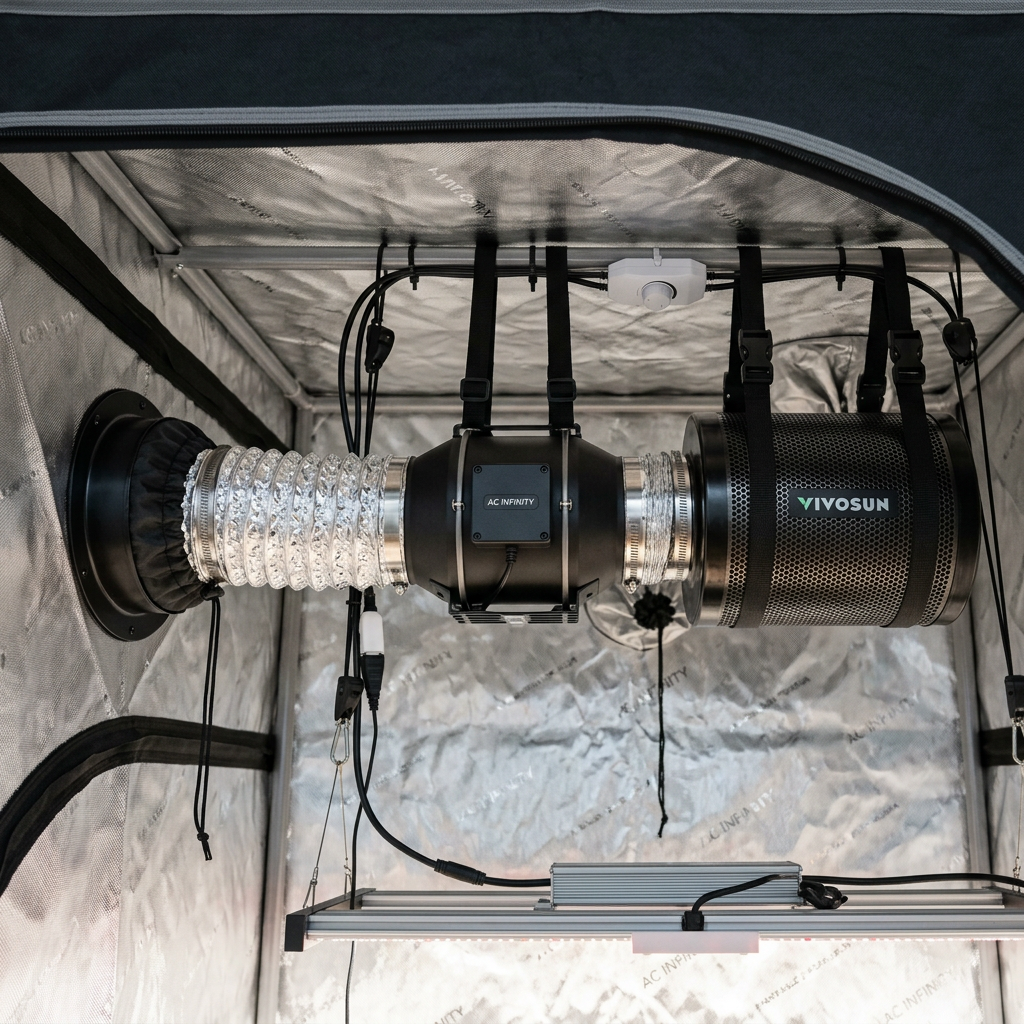
A 4×4×6.5 ft tent = 104 cubic feet. A 4-inch inline fan rated at 205 CFM gives you roughly two full air exchanges per minute — comfortable headroom.
Add a carbon filter if odour control matters (it usually does), and note that a filter adds 25–30% resistance, so size your fan accordingly. A 4-inch fan rated at 205 CFM with a carbon filter will effectively deliver around 150 CFM.
Inside Airflow Matters Too
An exhaust fan alone isn’t enough. Plants transpire, and that moisture needs somewhere to go — not just up and out through ducting, but moving gently around the canopy. Add at least one small oscillating fan inside the tent to circulate air across the leaves. This strengthens stems, prevents hot spots, and disrupts the still air layer that moulds love.
Keep the oscillating fan from blowing directly at plants. Set it to sweep across the canopy or bounce air off the tent wall first. Direct airflow at the leaf surface causes transpiration stress and dries out growing media faster than you expect.
Indoor Grow Tent Humidity Control: Stage-Specific Targets
Humidity isn’t a set-and-forget number. The right level changes throughout the plant’s life, and chasing one flat percentage will either slow your seedlings down or invite mould onto your fruiting canopy.
| Growth Stage | Target RH | Why It Matters |
|---|---|---|
| Seedlings / Propagation | 65–75% | High humidity reduces transpiration stress on undeveloped root systems |
| Vegetative | 55–70% | Supports rapid leaf and stem development; wide tolerance window |
| Early Flowering | 45–55% | Encourages resin production; begins reducing mould risk |
| Late Flower / Fruiting | 40–50% | Critical to prevent botrytis (grey mould) in dense canopies |
| Final Ripening | 35–45% | Lowest risk environment; prevents moisture damage to harvest |
The relationship between temperature and humidity is where VPD (vapour pressure deficit) becomes relevant. VPD describes how hard the air is “pulling” moisture from your plants—too low and transpiration slows, nutrient uptake stalls; too high and plants close stomata to conserve water, also slowing growth. If you want to optimize beyond basic hygrometer monitoring, the VPD Calculator on Grow With Hydroponics gives you stage-specific targets based on your actual temperature readings—genuinely useful for fine-tuning a maturing grow.
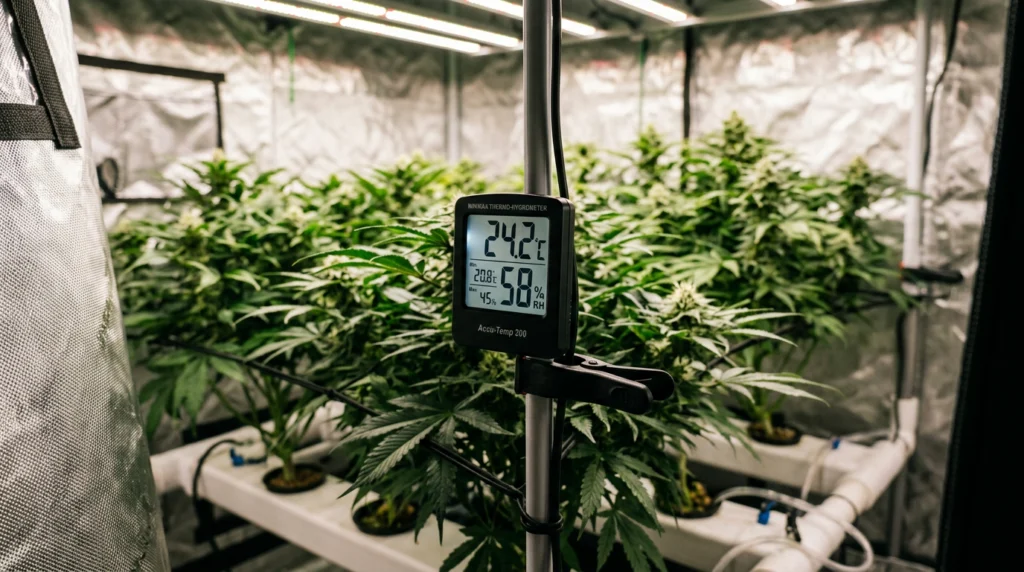
The relationship between temperature and humidity is where VPD (vapor pressure deficit) becomes relevant. If you want to go deeper on this before using the calculator, VPD explained for hydroponic growers walks through exactly how to read and act on your numbers.
Monitor humidity with a min/max thermo-hygrometer positioned at canopy height. Check both the lights-on and lights-off readings. Temperature typically drops 5–8°C when lights go off, which raises relative humidity—and that’s when mould gets its foothold if airflow is weak.
Choosing the Right Indoor Grow Tent: A Buyer’s Checklist
Not all tents are built equally, and the differences that matter aren’t always obvious in a product photo.
Canvas Denier: What the Numbers Mean
Denier measures thread thickness. Higher denier = denser weave = better light-proofing, less heat transfer, and longer life before seams and zippers fail.
- 200D–400D: Budget tents. Adequate for a casual first grow but prone to tearing and light leaks along seams. Canvas often separates from mylar lining over time.
- 600D: The entry-level sweet spot. Works well for most hobbyist applications, holds up to moderate handling. Most mid-range tents use 600D fabric.
- 1680D–2000D: Premium territory. Noticeably more rigid, better structural integrity under heavy lights and fans, and far better at blocking ambient light from disrupting photoperiods.
For most home growers, 600D is practical and sufficient. If you’re planning to use the tent long-term, hang a heavy LED and carbon filter combo, or run photoperiod-sensitive crops where light leaks cause problems, step up to 1680D.
Zippers: The First Failure Point on Cheap Tents
This sounds minor until your zipper breaks on week four of flower. Quality tents use double-stitched, lightproof zipper flaps with metal teeth. Avoid tents with exposed zippers that let light bleed in at the corners—a single daily light leak can disrupt a 12/12 photoperiod enough to cause issues with light-sensitive crops.
Frame and Hanging Bars
Check the hanging bar weight rating before buying any tent. A 4×4 tent with a 600W LED plus a carbon filter and inline fan can easily hang 15–20 kg from the top crossbars. Tents with plastic corner connectors tend to flex under this load. Metal connectors and thick-walled steel poles handle it without issue.
Common Indoor Grow Tent Mistakes (and How to Avoid Them)
Running the light too close to seedlings. A brand new LED at full power, hung 12 inches above fresh seedlings, will cause light bleaching within days. Dim the fixture or raise it to 24+ inches until seedlings establish.
No thermometer at canopy height. The temperature near your tent ceiling, where you measure it, can be 4–6°C hotter than where the plant actually lives. Always monitor at canopy level, not at eye height.
Ignoring lights-off humidity. Most mould problems start in the dark period, not under lights. Get a min/max hygrometer that records overnight readings, and don’t assume daytime readings tell the full story.
Passive intake only. Some small tents are designed for passive air intake through lower ports. Once you scale to a 4×4 or add a carbon filter, passive intake creates negative pressure that starves the tent of fresh CO₂. Add an intake fan — even a small one — if you notice stunted growth despite good nutrients and light.
Skipping the oscillating fan. Static air inside a tent breeds problems: hot spots under the light, transpiration layers around the canopy, and humid pockets in corners. A cheap clip-on fan on the lowest power setting solves all three.
Setting Up Your Indoor Grow Tent: A Step-by-Step Overview
- Choose and place the tent in a dry, accessible location near power outlets and away from direct draughts. Check that the floor can handle the weight.
- Assemble the frame and unzip all ports before hanging anything — it’s much easier to route ducting before the tent is full.
- Install the exhaust fan and carbon filter at the top of the tent. Run ducting out through a top port. Seal gaps with duct tape.
- Hang your grow light from the crossbars using ratchet hangers—they make height adjustments quick and keep the fixture level.
- Add the oscillating fan inside the tent on a low shelf or clipped to the frame, pointing at an angle to the canopy.
- Set up your grow system — NFT channels, DWC reservoir, grow bags, or whatever method you’re running — on the floor tray.
- Install a thermo-hygrometer at canopy height and leave it to record for 24 hours before adding plants. Know your baseline before you introduce anything living.
- Run the full setup under lights for 48 hours before planting. Dial in temperature and humidity, confirm the light schedule works, and check for light leaks at the zipper seams.
Grow Tent Size Comparison: Quick Reference
| Tent Size | Grow Area | Recommended LED Draw | Fan Size | Suggested Use |
|---|---|---|---|---|
| 2×2 ft | 4 sq ft | 80–120W actual | 4″ inline | Seedlings, clones, microgreens |
| 3×3 ft | 9 sq ft | 200–300W actual | 4″ inline | Herbs, lettuce, 4–6 plant veg |
| 4×4 ft | 16 sq ft | 400–600W actual | 6″ inline | Mixed crops, compact hydro systems |
| 5×5 ft | 25 sq ft | 600–800W actual | 6–8″ inline | High-yield veg or fruiting crops |
| 4×8 ft | 32 sq ft | 800–1200W actual | 8″ inline | Dual light zones, serious production |
FAQ: Indoor Grow Tents
Do I need a grow tent, or can I just use a spare room?
A spare room works, but a grow tent is significantly more efficient. The reflective lining means every photon your light produces gets a second chance to hit the canopy. In an open room, most side-spill light is absorbed by walls. For the same LED, a properly lined tent delivers 30–50% more usable light to plants than an unlined room.
How often should I replace the air in my grow tent?
Aim to exchange the full air volume once per minute for actively growing crops under full light. During seedling stages with lower heat load, once every two minutes is fine. The key is keeping CO₂ levels topped up — plants in a sealed tent with no airflow will deplete available CO₂ within hours, slowing photosynthesis noticeably.
Can I run a hydroponic system inside a grow tent?
Absolutely — and the two are well matched. NFT, DWC, Kratky, and aeroponics all fit comfortably inside tents sized appropriately for the system. The controlled environment actually benefits hydroponic plants more than soil grows, since nutrient delivery is already precise and environmental consistency makes uptake predictable.
My temperature is fine, but my plants still look stressed. What’s going on?
Check VPD rather than just temperature alone. A tent at 26°C with 65% RH is significantly more stressful for a flowering plant than 26°C at 50% RH. Also check root zone temperature if you’re running a hydroponic system—reservoir temperatures above 22°C invite pythium (root rot) regardless of how perfect the air looks.
How do I deal with light leaks in my grow tent?
Check zipper seams under complete darkness — you’ll see them as thin lines of light. Black gaffer tape patches small leaks effectively. For recurring leaks along the main zipper, a strip of dense foam weatherstripping pressed along the inside edge of the zipper flap usually solves it permanently.
Conclusion
An indoor grow tent is the most practical tool available for consistent, year-round plant production in any living space. But the tent itself is just the container—what happens inside it depends entirely on how well you manage the four core variables: light intensity, temperature, humidity, and airflow.
Get those right, and the tent rewards you with predictable, high-yielding crops regardless of season, outdoor temperature, or available space. Get them wrong, and a well-made tent still produces disappointing results. The good news is that once you understand why each component matters, dialing in your environment becomes straightforward rather than overwhelming.
If you’re still working out your setup or troubleshooting an existing one, the resources and tools at Grow With Hydroponics are genuinely useful starting points—particularly the VPD Calculator if you’re running fruiting crops and the Grow Space Planner if you’re sizing your first system.
Start small, get the fundamentals right, and expand from there. A 3×3 tent running properly will outperform a 5×5 tent running poorly every single time.
🛒 Recommended Grow Tents & Complete Kits
Setting up from scratch? A complete kit takes the guesswork out of compatibility. These include tent, lighting, ventilation, and often growing media — everything sized to work together.
Shop Smart — browse our curated affiliate picks for grow tents and complete kits before buying individual components. Pairing mismatched equipment is one of the most common (and expensive) beginner mistakes.


💡 Grow Lights for Your Tent
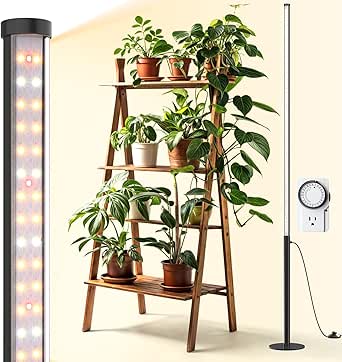
Once you know your tent size, matching the right LED draw is straightforward. These full-spectrum LEDs are sized for common tent footprints and cover both vegetative and flowering stages.



🌱 Growing Kits & Hydroponic Systems
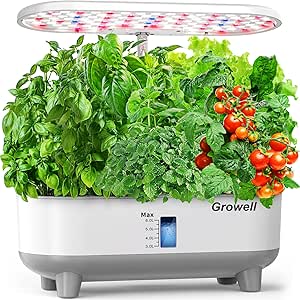
Ready to add a hydroponic system inside your tent? These kits are sized for 3×3 to 4×4 spaces and work well within a controlled tent environment.


💨 Ventilation Equipment
Don’t overlook airflow. These inline fans, carbon filters, and ducting combos are matched to common tent sizes and keep your environment dialled in.


