

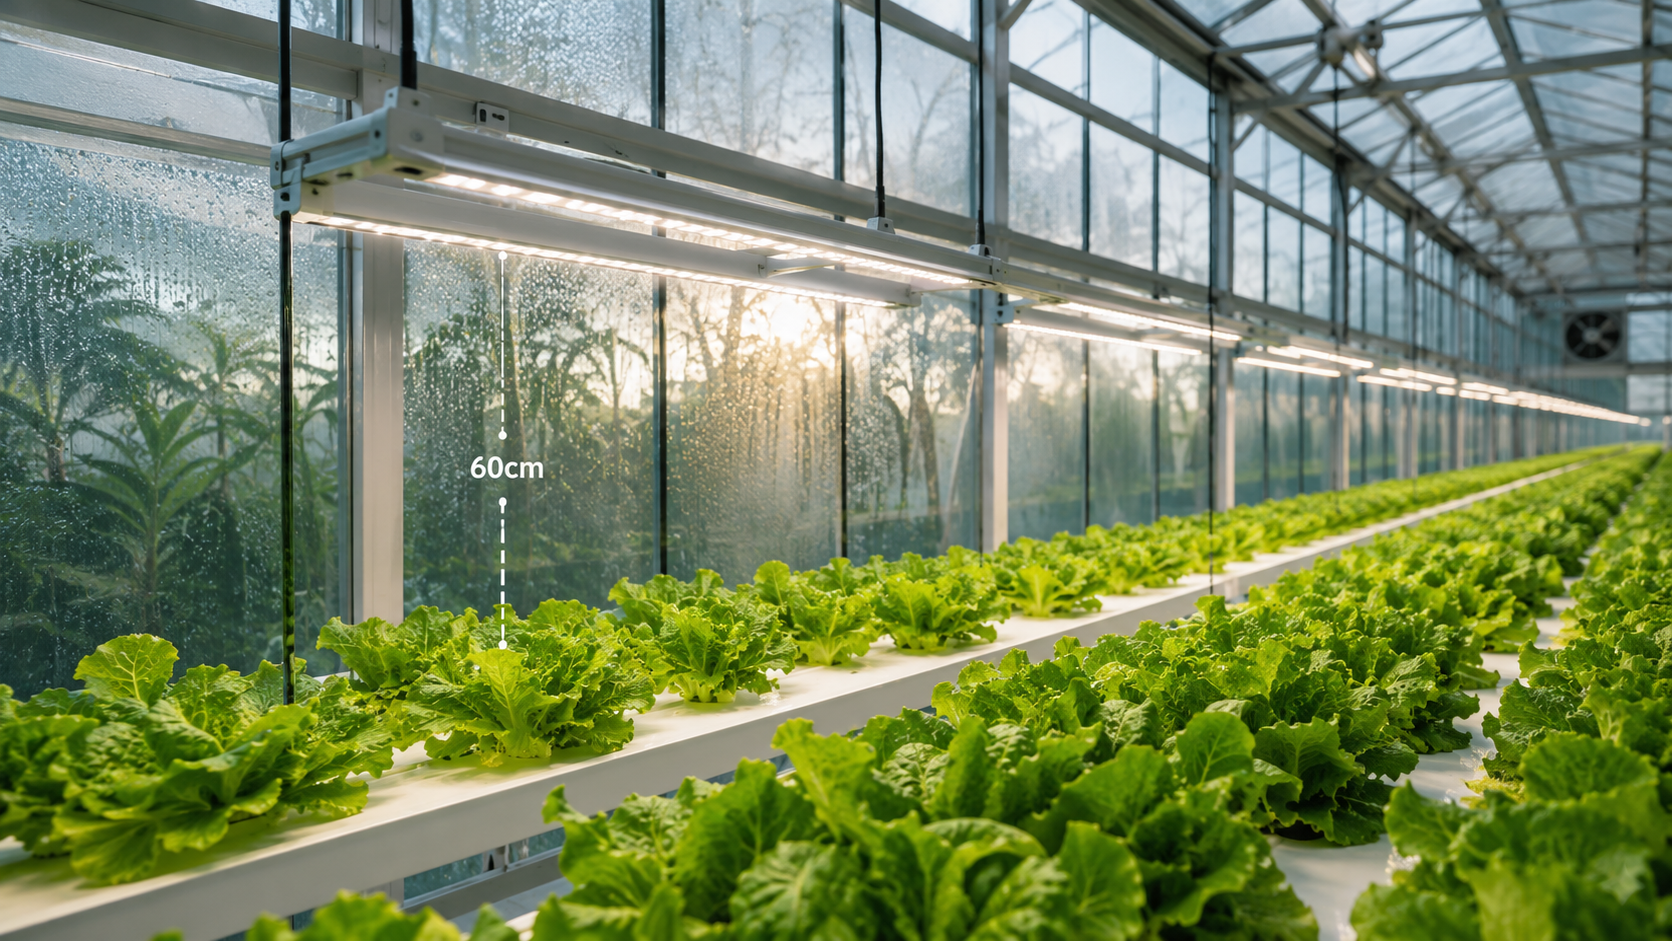
Most growers who invest in greenhouse LED grow lights make the same mistake. They buy based on wattage. Maybe the brand name. Sometimes just the price. And then they wonder why their tomatoes are still underperforming in January or why their lettuce keeps bolting despite the light running all day.
The problem isn’t the fixture. It’s that they’re treating light as something to add, rather than something to measure and manage. At Grow With Hydroponics, we’ve built tools specifically to change that approach — because the difference between guesswork and a real lighting plan is usually thousands of dollars in wasted electricity and missed harvests.
This guide covers everything you need to plan, buy, and optimise greenhouse LED grow lights the right way: what DLI and PPFD actually mean for your setup, which numbers matter when comparing fixtures, how to calculate exactly how much supplemental light you need, and when top lighting or inter-lighting makes more sense. No marketing fluff. Just the practical framework growers actually need.
Quick Answer Greenhouse LED grow lights supplement natural sunlight when your greenhouse DLI drops below crop targets — which happens on every cloudy day and throughout winter. To size your system correctly: measure or estimate your current greenhouse DLI, subtract it from your crop’s target DLI, then use that deficit to calculate the supplemental PPFD you need. Look for fixtures with a PPE above 2.5 µmol/J. Anything above 3.0 µmol/J is top-tier efficiency. Mount them with IP65+ ratings and dimming capability, and run them on DLI-based controls rather than fixed timers.
Why Does Your Greenhouse Need Supplemental Lighting?
Your greenhouse does not receive the same light as outdoors. Most growers assume the glass handles most of the work — but glazing and structural framing cut incoming sunlight significantly. Depending on your covering material, your greenhouse typically transmits only 30–70% of outdoor DLI:
- Polycarbonate: 70–80% light transmission
- Single-pane glass: 85–90%
- ETFE (ethylene tetrafluoroethylene film): Above 95%
On a clear summer day at mid-latitude, that’s manageable. But on a cloudy winter day, your outdoor DLI might drop to 4–8 mol/m²/day, and after greenhouse losses, your crop is receiving 3–5 mol/m²/day. Lettuce stalls. Tomatoes won’t set fruit. Basil stretches thin and bitter. That gap — between what the sun provides and what your crop needs — is exactly what greenhouse LED grow lights exist to close.
What Is Supplemental vs. Photoperiod Lighting?
These two terms get lumped together constantly, and confusing them leads to bad buying decisions.
Supplemental lighting adds actual photosynthetic energy. It’s about delivering enough PAR (photosynthetically active radiation) to hit your DLI target when natural light falls short. Higher intensity, higher wattage, direct impact on growth rate and yield.
Photoperiod lighting is low-intensity signal lighting — usually under 10 µmol/m²/s — used to control when plants flower or bolt, without meaningfully changing growth rate. It costs almost nothing to run but plays a completely different role.
Most growers need supplemental lighting. Some crops also need photoperiod control. They’re not the same thing, and a fixture designed for one won’t substitute for the other.
Understanding DLI: The Number That Actually Drives Your Lighting Decisions
Daily Light Integral, or DLI, is the total amount of photosynthetically active light your plants receive over an entire day, measured in mol/m²/day. Think of it like a plant’s energy bank account — PPFD is the hourly deposit rate, DLI is the end-of-day balance.
What DLI Targets Should You Hit by Crop?
| Crop | Target DLI (mol/m²/day) | Supplemental PPFD Needed (Winter) |
|---|---|---|
| Microgreens | 8–12 | 50–80 µmol/m²/s |
| Lettuce / Spinach | 12–17 | 60–100 µmol/m²/s |
| Herbs (basil, cilantro) | 14–18 | 70–110 µmol/m²/s |
| Strawberries | 16–22 | 90–140 µmol/m²/s |
| Tomatoes / Peppers | 20–30 | 150–250 µmol/m²/s |
| Cucumbers | 18–25 | 120–200 µmol/m²/s |
| Cannabis (flower) | 30–50+ | 250–400+ µmol/m²/s |
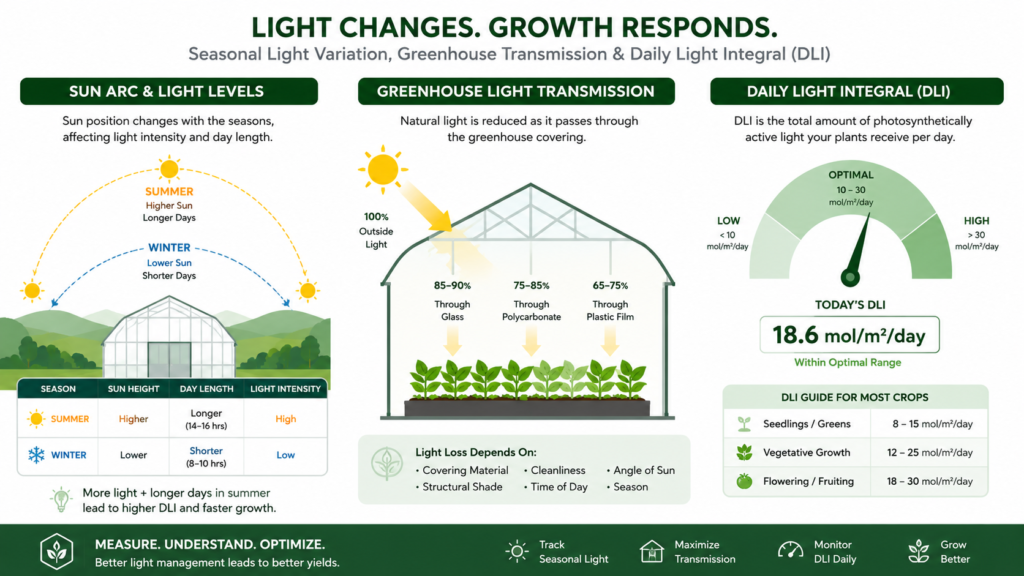
These are starting-point ranges, not exact prescriptions. Your latitude, glazing type, and seasonal variation all shift the numbers. The formula to convert your DLI deficit into a required PPFD is straightforward:
PPFD (µmol/m²/s) = (Deficit DLI × 1,000,000) ÷ (Daily light hours × 3,600)
So if your crop needs 16 mol/m²/day and your greenhouse only delivers 10.4 mol on a winter day, your deficit is 5.6 mol. Running supplemental lights for 20 hours: 5.6 × 1,000,000 ÷ (20 × 3,600) = roughly 78 µmol/m²/s of supplemental PPFD.
Not 300. Not 600. Seventy-eight. That’s a useful, real number — and it’s probably a lot less light than the fixture manufacturer’s marketing suggests you need.
Use our free DLI Calculator to model your seasonal baseline before you budget for fixtures. It takes five minutes and prevents expensive sizing mistakes.
What Actually Matters When Comparing Greenhouse LED Grow Light Fixtures
PPE: The Efficiency Metric That Protects Your ROI
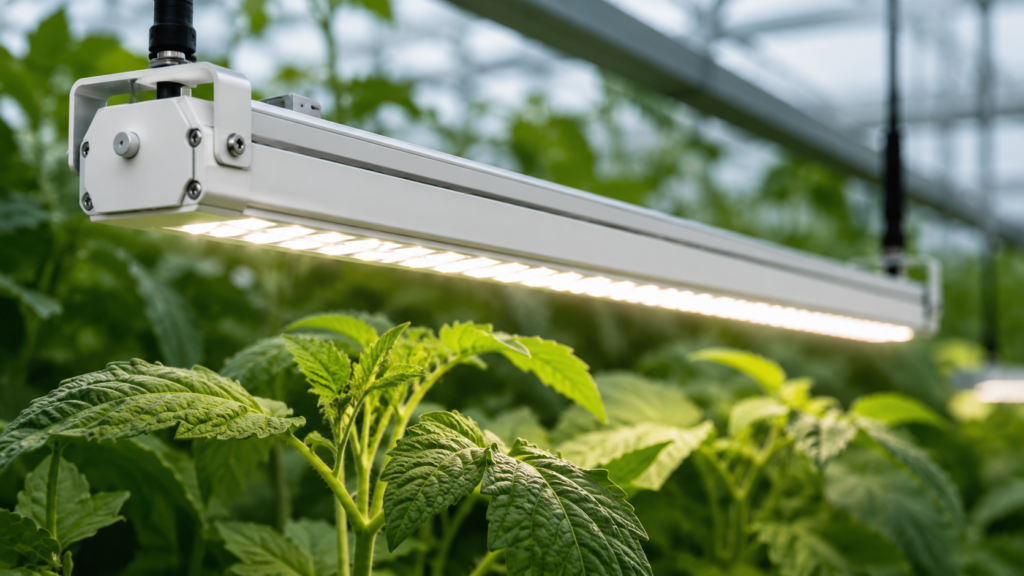
PPE, or Photosynthetic Photon Efficacy, measures how many usable photons you get per joule of electricity consumed — expressed as µmol/J. This is the single most important number when comparing greenhouse LED grow lights for running costs.
Here’s where the benchmarks sit in 2026:
- Below 2.5 µmol/J: Legacy performance. Not worth buying.
- 2.5–2.8 µmol/J: Entry-level commercial. Acceptable.
- 2.8–3.0 µmol/J: Good. This is the mid-market sweet spot.
- Above 3.0 µmol/J: Top-tier. Worth paying a premium for large or permanent installations.
- HPS (real-world, aged): 1.5–1.7 µmol/J.
That gap between top-tier LEDs and HPS explains why payback periods on LED upgrades have fallen sharply. A fixture pulling 600W at 3.2 µmol/J delivers 1,920 µmol/s. An HPS setup delivering the same light output would consume two to three times more electricity. Over a full winter season, that math adds up fast.
PPF vs. PPFD: Don’t Confuse Output With Intensity
PPF (Photosynthetic Photon Flux) is the total photon output of the fixture in µmol/s. It tells you how much light leaves the fixture.
PPFD is how much of that light actually lands on your canopy per square metre per second. It depends on mounting height, fixture spacing, and reflectivity.
A fixture with excellent PPF can deliver terrible PPFD uniformity if it’s mounted at the wrong height or spaced incorrectly. Always ask for third-party photometric data — a PPFD map showing light distribution at the mounting height you’ll use. If a manufacturer can’t provide this, that’s a red flag.
IP Rating: Non-Negotiable for Greenhouse Environments
Greenhouses are wet, humid, and prone to condensation. Every fixture you install needs a minimum IP65 rating, which means it’s completely dust-tight and protected against water jets. IP66 or IP67 is better for high-wash environments. Any fixture not rated for moisture in a greenhouse will fail early, void its warranty, and potentially create an electrical hazard.
Look for fixtures certified to UL 8800 (the North American standard for horticultural luminaires) and DLC Horticultural V3.0 Premium rating, which independently verifies PPE above 2.5 µmol/J.
Top Lighting vs. Inter-Lighting: Which Do You Need?
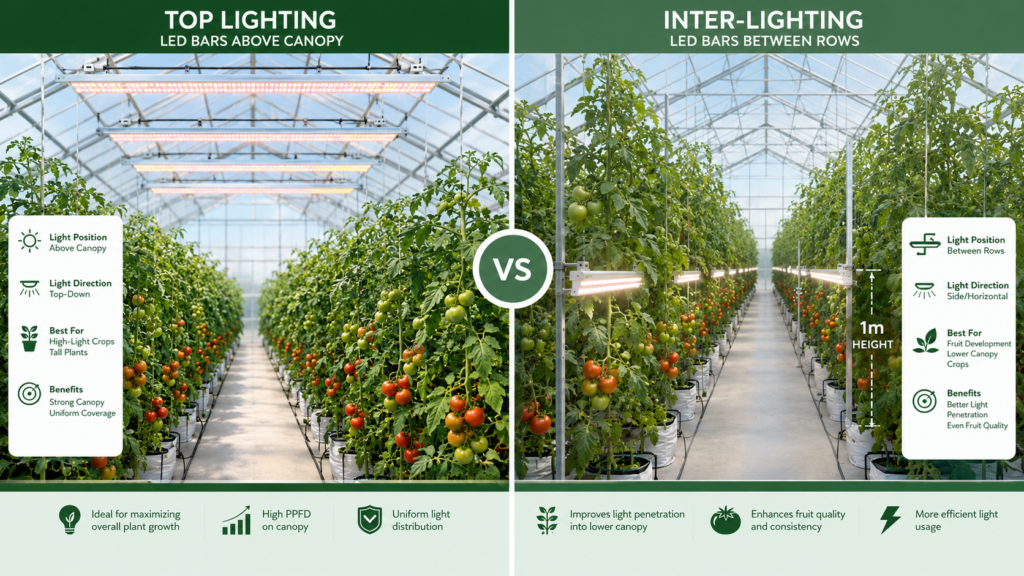
Top Lighting: The Foundation for Most Greenhouse Applications
Top lighting fixtures mount above the crop canopy — typically 30–90 cm above the canopy surface depending on target PPFD and beam spread. This approach works for most greenhouse applications: leafy greens, herbs, propagation, bench systems, and low-to-medium canopy fruiting crops.
The design priority is uniformity. Uneven light distribution across a bench creates uneven crops — you’ll harvest at the right time from some plants while others lag a week behind. Aim for a minimum/average PPFD uniformity ratio above 0.7 across the canopy. Anything below 0.6 will show up in your harvest consistency.
Inter-Lighting: For Tall Canopy Crops Like Tomatoes
Tomatoes, cucumbers, and peppers grown on high wire systems create a dense upper canopy that blocks light from reaching lower leaves and developing fruit trusses. By the time light penetrates 60–80 cm into the canopy, usable PPFD can drop by 40–60%.
Inter-lighting places LED bar fixtures horizontally within the canopy — usually at 1–1.5 metre height increments — to deliver light directly where the upper canopy is blocking it.
LED grow light hanging height and coverage affect yield dramatically in tall canopy systems — proper inter-lighting placement can improve lower-fruit set and increase total yield per square metre, especially in winter months when reduced light penetration combines with lower natural DLI.
The most advanced greenhouse setups combine both: top lighting for the base DLI load and inter-lighting for canopy penetration. It’s more complex to design and more expensive to install, but the yield data from commercial tomato operations consistently supports it.
How to Set Up DLI-Based Controls (And Why Fixed Timers Are Costing You Money)
Running your greenhouse LEDs on a simple timer is the lighting equivalent of watering your plants on a schedule regardless of soil moisture. It works. It’s just not efficient.
DLI-Based Controls Fill the Gap, Not the Hours
A DLI-based control system uses a PAR sensor to monitor how much natural light your greenhouse is actually receiving at canopy level throughout the day. When natural PPFD is high — clear morning, full sun — the LEDs dim down or switch off. When clouds roll in, they ramp back up to fill the deficit.
The result: your crops hit their daily DLI target every day, not just on sunny ones. And you’re only paying for the electricity you actually need — not running lights at full power on a bright summer morning because the timer says so.
Zoning: Fix Hotspots and Dark Edges Without Overspending
Greenhouses aren’t uniform. The structural ridge casts a shadow band. End walls block morning and evening light. Growing benches near the centre receive more natural light than those along the perimeter.
Zoning divides your greenhouse into independently controlled lighting sections, letting you run edge zones at higher intensity without wasting power in the centre. This matters most for large structures — hobby greenhouses under 100 m² can usually get away with uniform control — but even basic two-zone setups can meaningfully reduce electricity costs and improve PPFD uniformity.
Common Greenhouse LED Grow Light Mistakes
- Buying on wattage alone. Wattage tells you how much electricity a fixture consumes, not how much plant-usable light it produces. A 600W fixture with 2.2 µmol/J efficacy produces fewer photons than a 500W fixture at 2.9 µmol/J.
- Skipping the CO₂ check. More light drives faster photosynthesis, which depletes CO₂ faster. In a sealed winter greenhouse with low ventilation, CO₂ can drop below ambient levels within hours of lights-on. Supplemental lighting without CO₂ monitoring is half a solution.
- Ignoring heat load changes. LEDs run cooler than HPS, which sounds like a pure win — but in winter, that missing heat has to come from somewhere. If your heating system was sized for HPS, switching to LEDs may require a heating adjustment.
- Not measuring PPFD after installation. Always measure. Manufacturer PPFD maps are theoretical. Mounting heights shift. Reflectivity varies. Measure with a calibrated quantum sensor at 12–15 canopy-level points across your growing area after installation, and adjust before planting.
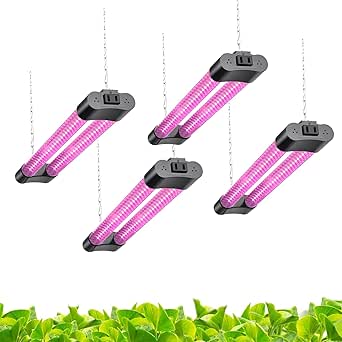
Shop Smart: Greenhouse LED Grow Light Kits
If you’re ready to spec out a supplemental lighting system, start with PPE above 2.8 µmol/J, dimming capability, and IP65+ certification. Our Shop Smart page filters for performance-rated lighting rather than marketing spec sheets.




Greenhouse LED Grow Lights: Quick Comparison Table
| Feature | What to Look For | Red Flag |
|---|---|---|
| PPE (Photosynthetic Photon Efficacy) | Above 2.8 µmol/J | Below 2.5 µmol/J |
| PPFD uniformity | Min/avg ratio > 0.7 | No photometric data provided |
| IP Rating | IP65 minimum | No IP rating listed |
| Certifications | UL 8800, DLC Horticultural V3.0 | No third-party certification |
| Dimming | 0–100% continuous dimming | Binary on/off only |
| Warranty | 5 years minimum | Under 3 years |
| Spectrum | Full white + red, or crop-specific | “10,000K full spectrum” with no PAR data |
| Controls | DLI-based / sensor-dimming | Timer-only |
FAQ: Greenhouse LED Grow Lights
How much supplemental light does a greenhouse actually need in winter?
It depends on your location, glazing, and crop. On a cloudy winter day, a greenhouse in a northern latitude might receive only 3–6 mol/m²/day at canopy level. For leafy greens needing 14–17 mol/m²/day, you’d need to supplement 8–11 mol. Converted to PPFD over a 16-hour day, that’s approximately 140–190 µmol/m²/s of supplemental light intensity. Use the DLI Calculator to model your specific situation.
What PPE should I look for in a greenhouse LED grow light?
Look for a minimum of 2.5 µmol/J for basic installations, and above 3.0 µmol/J for commercial-scale or long-term deployments where energy costs are a major factor. By comparison, high-pressure sodium (HPS) fixtures deliver roughly 1.5–1.7 µmol/J in real-world conditions — so modern LEDs typically use 40–50% less electricity for the same photon output.
Can greenhouse LED grow lights replace sunlight completely?
Yes, in principle — but it requires high PPFD (typically 600–1,000+ µmol/m²/s depending on crop) and significantly longer photoperiods, which drives electricity costs up sharply. Most greenhouse applications use LEDs for supplemental top-up rather than full sun replacement. Sole-source LED production makes more economic sense in fully enclosed vertical farms or growth chambers.
Do I need full spectrum LEDs for my greenhouse?
For most greenhouse crops, a broad-spectrum white-plus-red approach works well across growth stages. Dedicated red/blue configurations can be slightly more energy-efficient for targeted applications, but the visual comfort disadvantage (that harsh purple colour) can make canopy scouting harder. For mixed-crop greenhouses, a neutral or warm-white plus deep-red spectrum gives you reasonable crop quality and worker-friendly light quality.
How far should LED grow lights hang above greenhouse crops?
For most top-light bar arrays running at supplemental PPFD levels (60–200 µmol/m²/s), mounting heights of 50–90 cm above the canopy provide good uniformity without hotspots. Higher mounting increases coverage area but reduces intensity. Always check the manufacturer’s photometric data for the specific fixture — and then measure actual PPFD after installation rather than trusting the layout diagram alone.
Getting Your Greenhouse Lighting Right
Greenhouse LED grow lights work. But only when you start with the right questions: What DLI does my crop need? What is my greenhouse already delivering? How much supplemental PPFD closes that gap efficiently?
The growers who struggle with lighting don’t have bad fixtures. They have gaps in their planning process. Treat light as a measurable, manageable input — not a seasonal variable you can’t control — and the ROI from a good supplemental lighting system becomes predictable rather than hopeful.
Grow With Hydroponics has the tools to make that planning process concrete: our free DLI Calculator helps you model your seasonal light baseline and calculate the exact supplemental PPFD you need before spending anything. Start there. Buy fixtures second.
