
Spend ten minutes on any growing forum, and you’ll find growers swearing CO2 enrichment doubled their yields—and others saying it made zero difference. Both are probably telling the truth. That’s because CO2 is one of the few inputs in indoor growing that genuinely works as advertised, but only when the conditions to use it are already in place. Add it too early, in the wrong environment, or without enough light behind it, and you’ll spend money on cylinders while your plants carry on exactly as before.
This guide covers what CO2 actually does for your plants, when it’s worth using and when it isn’t, how to calculate exactly how much your grow room needs, and how to avoid the mistakes that make most beginner CO2 setups underperform. If you want to skip straight to the numbers, the CO2 Calculator at Grow With Hydroponics handles the math—but understanding the reasoning behind the numbers makes every adjustment you make more accurate.
What Is CO2 and Why Do Plants Need It?
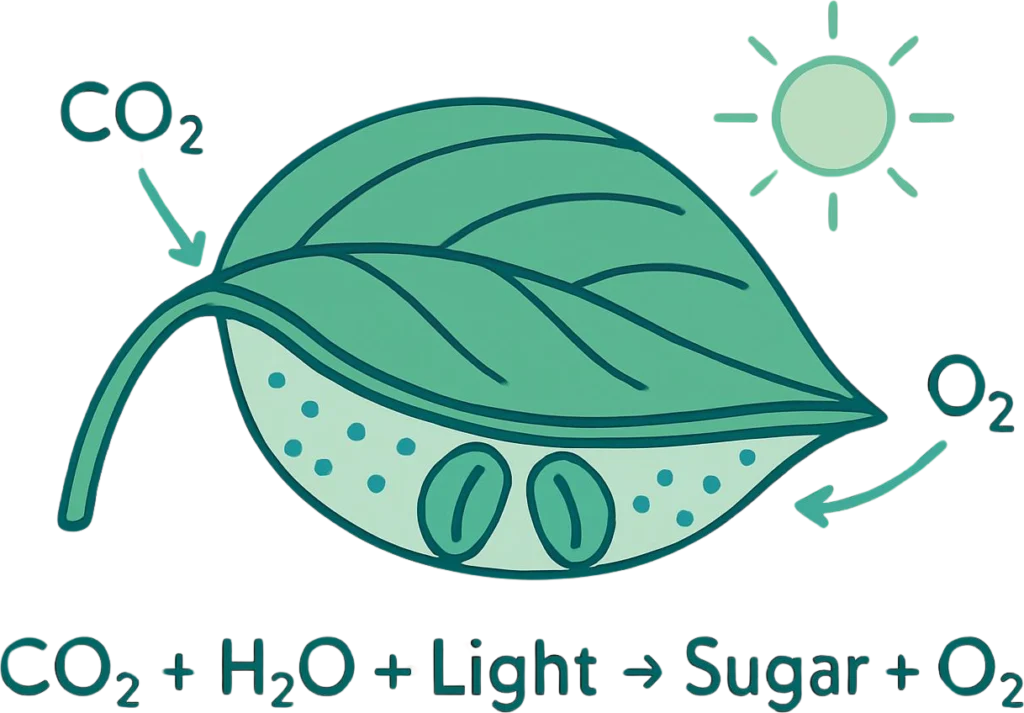
Carbon dioxide—CO₂—is one of the three raw materials plants use to build themselves. Through photosynthesis, plants combine CO2, water, and light energy to produce sugars and oxygen. Those sugars are what drive growth: stem elongation, root development, leaf expansion, and eventually flower and fruit production.
Outdoor air contains roughly 400–420 parts per million (ppm) of CO2. In a sealed indoor grow room, plants consume that available CO2 quickly. Within hours of lights-on, CO2 levels in an unventilated space can drop from ambient to well below 300 ppm. At that point, photosynthesis slows down even if light, nutrients, and water are all perfectly dialled in.
That’s the problem CO2 enrichment solves. It keeps the concentration of CO2 high enough that your plants can photosynthesise at full capacity throughout the entire lights-on period—not just during the first hour before CO2 gets depleted.
How Does CO2 Enrichment Actually Improve Growth?
Here’s the mechanism that matters: when CO2 is plentiful, plants open their stomata wider and keep them open longer. More CO2 comes in. More sugars get produced. Growth accelerates.
When CO2 runs low, stomata partially close as the plant tries to conserve water—but this also restricts CO2 intake, creating a double bottleneck. The plant ends up both CO2-starved and partially water-stressed even in a well-managed grow room.
Raising CO2 levels to the 1,000–1,500 ppm range allows plants to operate at a higher photosynthetic rate, using more of the light energy being delivered to the canopy. Growth rates increase, nutrient uptake improves because the plant is drinking and feeding more actively, and overall structure tends to be stronger.
The caveat—and it’s an important one—is that CO2 enrichment is only effective when light intensity is high enough for the plant to use the extra CO2. More on that below.
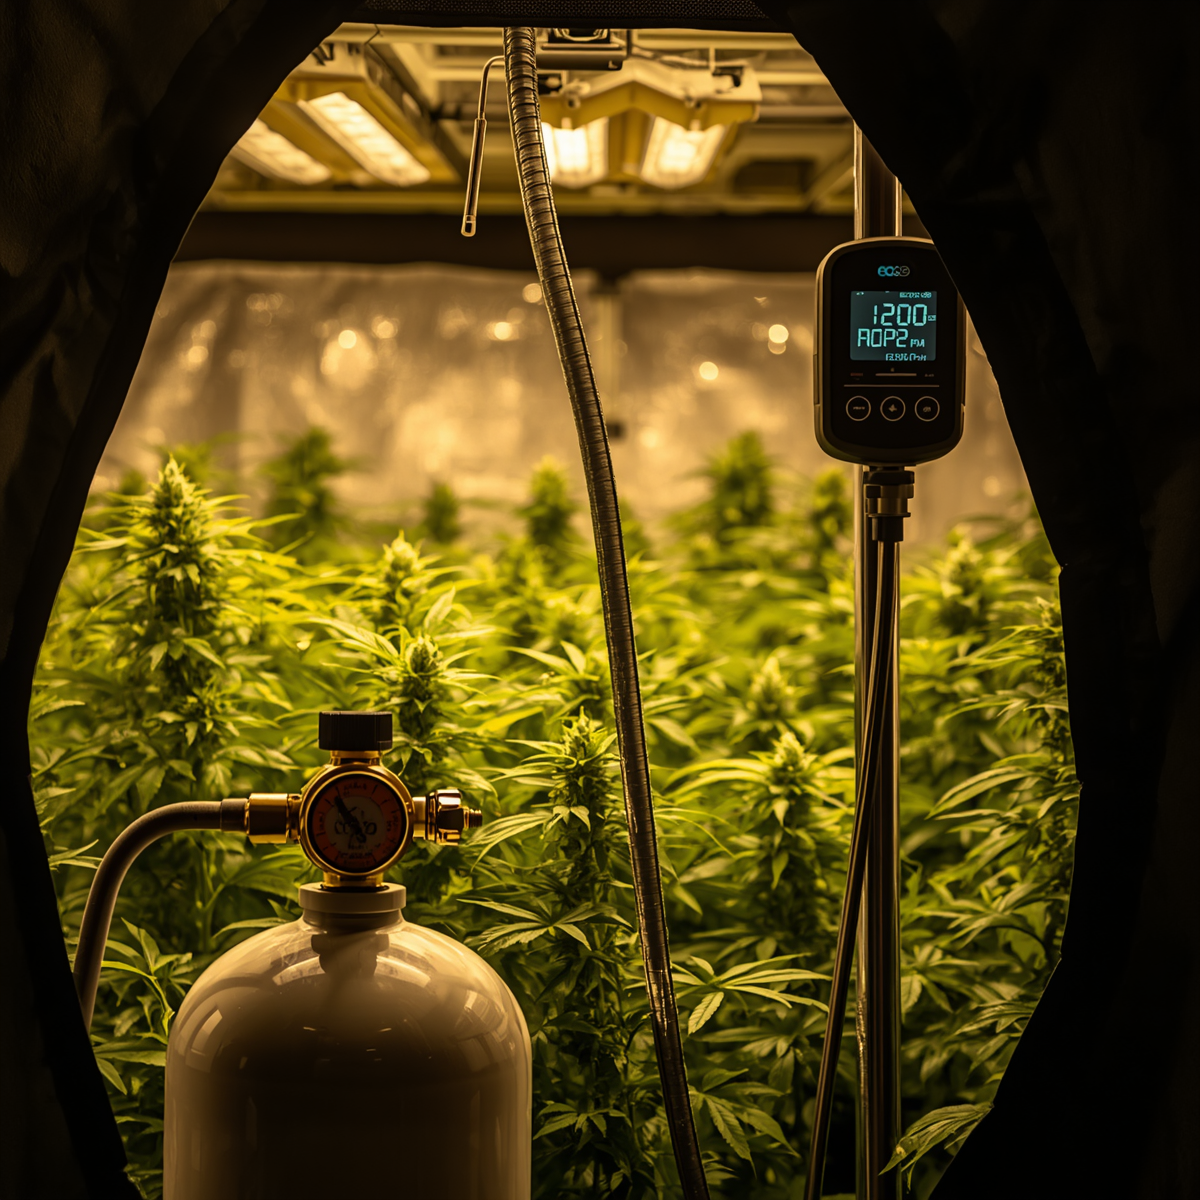
Climate Control Gear for CO2-Enriched Grows
Running CO2 in a sealed room means your humidity management has to keep up. The plants transpire harder, and without proper airflow, you’ll be fighting mould instead of chasing yield. These are the ventilation and climate tools growers pair with CO₂ enrichment setups.


Not sure if your environment is stable enough for CO2? Check your VPD first using our VPD Calculator.
What Is the Optimal CO2 PPM for Indoor Plants?
Ambient outdoor CO2 sits at around 400–420 ppm. That’s the baseline. Here’s how CO2 levels affect plant performance in a grow room:
| CO2 Level (ppm) | Effect on Plants |
|---|---|
| Below 200 ppm | Photosynthesis slows severely—critical deficiency |
| 200–400 ppm | Sub-optimal; plants growing below potential |
| 400–600 ppm | Ambient atmospheric range — adequate baseline |
| 800–1,000 ppm | Noticeable improvement in growth and nutrient uptake |
| 1,000–1,500 ppm | Optimal enrichment range for most indoor crops |
| 1,500–2,000 ppm | Diminishing returns; benefits depend heavily on light intensity |
| Above 2,000 ppm | Risk of stomatal closure and plant stress; no additional benefit |
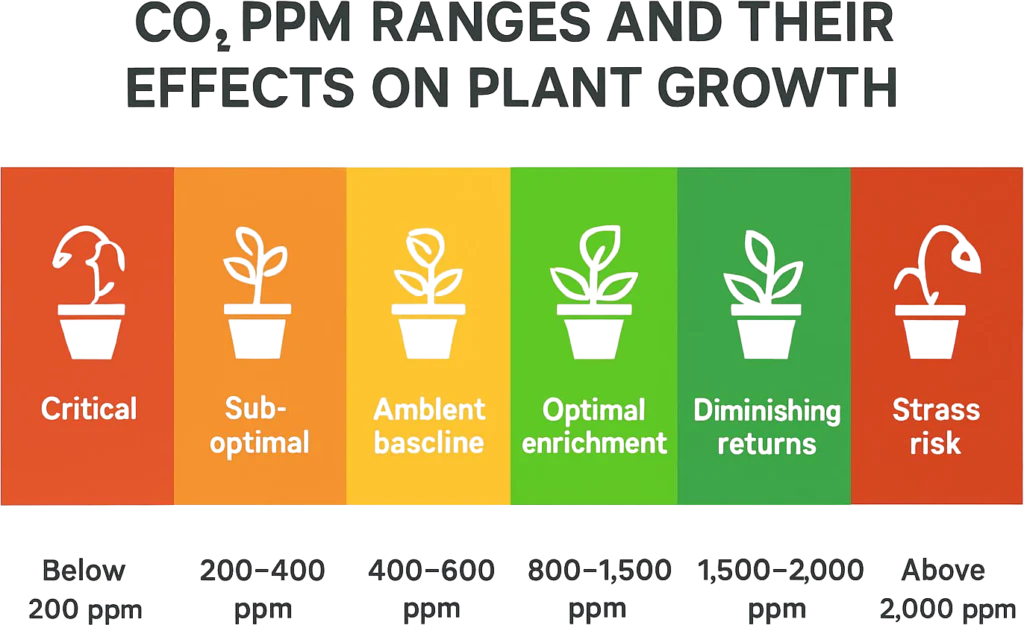
For most indoor hydroponic setups, the practical target is 1,000–1,500 ppm during the lights-on period. Vegetative plants benefit from the lower end of that range — around 800–1,000 ppm. Flowering plants under high-intensity lighting can make use of 1,200–1,500 ppm. Above 1,500 ppm, results become increasingly dependent on having very high light output, and the gain-per-dollar-of-CO2 ratio drops off sharply.
CO2 Only Works When Light Is High Enough—This Is What Most Growers Miss
This is the most important concept in CO2 management, and it’s the reason why some growers see dramatic results and others see nothing.
CO2 and light work together in photosynthesis. Light provides the energy. CO2 provides the carbon. If either one is insufficient, the other can’t compensate. Pouring extra CO2 into a grow room lit by underpowered LEDs is like pressing the accelerator on a car with no fuel.
The general consensus among experienced growers and horticultural research is that CO2 enrichment shows meaningful returns only when PPFD (photosynthetic photon flux density—the measure of usable light reaching the canopy) is above roughly 600 µmol/m²/s. Below that threshold, ambient CO2 levels are not the limiting factor. The light is.
Practically, this means:
- Small grow tents with entry-level LEDs (under 400W actual draw): CO2 enrichment will likely deliver little to no benefit. Fix the lighting first.
- Mid-sized setups with quality LEDs hitting 600–1,000 PPFD at the canopy: CO2 enrichment will show a real difference, especially in vegetative growth speed.
- High-output rooms above 1,000 PPFD: This is where CO2 enrichment earns its cost most clearly. Flowering plants under intense light will actually use the extra CO2.
Grow Lights That Actually Justify CO2 Enrichment
There’s no point spending on CO2 if your lights can’t put plants in the position to use it. You need consistent PPFD above 600 µmol/m²/s at canopy before enrichment makes economic sense. These are the lights growers actually run in CO2-enriched setups.


Gardening rarely rewards guesswork. Before investing in CO2 equipment, check your DLI and PPFD values. The DLI Calculator at Grow With Hydroponics makes that straightforward.
How to Calculate CO2 for Your Grow Room
Once you’ve established that your lighting supports CO2 enrichment, the next step is calculating how much CO2 your space actually needs. Getting this right means not wasting gas and not creating unsafe conditions.
The CO2 Formula
The fundamental calculation is:
CO2 needed = (Target ppm − Current ppm) ÷ 1,000,000 × Room Volume
Room volume is simply length × width × height in cubic feet (or meters—just be consistent). The current ppm is typically ambient atmospheric CO2, which is approximately 400–420 ppm if your room has reasonable air exchange. Your target ppm is wherever you’re aiming — typically 1,000–1,500 ppm.
A Practical Example
Grow room: 5 ft × 5 ft × 7 ft = 175 cubic feet Current CO2: 420 ppm Target CO2: 1,200 ppm
CO2 needed = (1,200 − 420) ÷ 1,000,000 × 175 CO2 needed = 0.000780 × 175 CO2 needed ≈ 0.137 cubic feet
That’s the amount needed to raise the room from ambient to 1,200 ppm in a single dose—assuming a well-sealed space with no ventilation running. If you want to deliver that over a two-hour window rather than all at once:
Flow rate = CO2 needed ÷ delivery time in hours = 0.137 ÷ 2 = ~0.069 cubic feet per hour
Slow, controlled release is always better than dumping CO2 in a single burst. Plants absorb CO2 through their stomata gradually, not all at once, and a sudden spike does little compared to a stable elevated concentration maintained throughout the lights-on period.
You can run all of this through the CO2 Calculator directly—input your dimensions, current and target ppm, and preferred delivery duration, and it returns your required flow rate instantly.
CO2 Enrichment Methods: Which Setup Is Right for Your Grow?
There’s no single best method. The right approach depends on your grow space size, budget, and how much hands-on management you want to do.
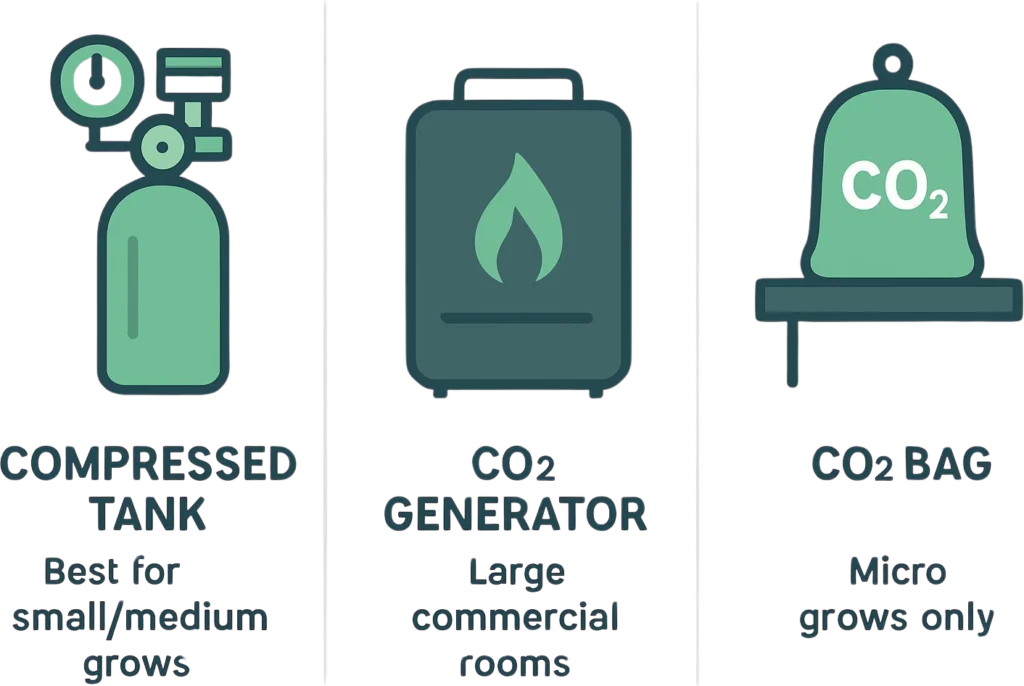
Compressed CO2 Tanks
Pressurised cylinders of CO2 connected to a regulator and timer. The most controllable option for small to mid-sized grow rooms. You set the flow rate on the regulator, programme the timer to release CO2 during the lights-on period, and top up or swap the cylinder when it runs low.
Tanks are clean, silent, produce no extra heat, and give you precise control. The drawback is the ongoing cost of refills, typically available from brewing supply shops, welding suppliers, or some hydroponic retailers.
CO2 Generators
Propane or natural gas burners that produce CO2 through combustion. Much cheaper to run than tanks for large spaces. But the combustion process also generates significant heat and water vapour, which complicates climate management—especially in rooms where temperature and humidity are already being carefully controlled. For most home growers and small-to-medium setups, a compressed tank system is the cleaner and safer choice.
CO2 Bags and Passive Sources
Mycelium-based bags and chemical CO2 pads release small amounts of CO2 passively as they break down. These work in very small enclosed spaces — a 2×4 tent, for example — and cost very little. But output is uncontrollable and inconsistent. They can’t raise CO2 to 1,200+ ppm reliably, and there’s no way to dial in a target level. Fine as a supplementary measure for micro-grows; not suitable as a primary CO2 system for any serious setup.
Here’s a quick comparison to help you decide:
| Method | Best For | Pros | Cons |
|---|---|---|---|
| Compressed CO2 Tank | Small–medium grow rooms | Precise, clean, no extra heat | Ongoing refill cost |
| CO2 Generator | Large commercial grows | Low running cost | Heat, humidity, fire risk |
| CO2 Bags / Pads | Micro grows, stealth setups | Cheap, no equipment needed | Uncontrollable, low output |
Shop Smart: Browse ventilation and CO2 management equipment at the Grow With Hydroponics shop — kit selected for real grow room use, not just spec sheets.
CO2 and Your Grow Room Environment: What Changes When You Enrich
Adding CO2 to a sealed grow room doesn’t just change one variable. It shifts several, and growers who don’t account for this often end up frustrated with inconsistent results.
Temperature
Plants under elevated CO2 operate more efficiently at slightly higher temperatures—typically 26–29°C (79–85°F) rather than the more conservative 22–26°C range that works without enrichment. Photosynthesis runs faster at higher temperatures when CO2 is not the limiting factor. If your room runs cool, much of the CO2 benefit is lost.
Humidity
Both CO2 generators and the increased transpiration that comes with elevated CO2 raise humidity. Plants under enrichment transpire more actively, releasing more water vapour. Without a dehumidifier running to compensate—particularly in flowering—humidity can climb into mould risk territory quickly. A sealed room with CO2 enrichment almost always needs active humidity management alongside it.
Ventilation and Room Sealing
CO2 enrichment only works consistently in a sealed or semi-sealed environment. If intake and exhaust fans are running constantly, they’re simply venting the CO2 you’re adding outside as fast as you’re injecting it. The practical approach is to seal the room, run CO2 during lights-on, and ventilate in short bursts at set intervals rather than continuously.
CO2 is also heavier than air—it sinks to the floor rather than distributing evenly. For best results, release CO2 slightly above the canopy level, not from floor level, and use internal circulation fans to keep it moving through the leaf zone rather than pooling at the base of the room.
Grow Tents Built for Sealed CO2 Setups
CO2 enrichment only delivers consistent results in an enclosed space. A quality grow tent with properly sealed vents and a zipper you can actually trust makes the difference between hitting 1,200 ppm and watching your CO2 disappear into the room within minutes.


Common CO2 Mistakes Grow Room Growers Make
Running CO2 With the Lights Off
Plants only photosynthesise in light. At night, stomata largely close and CO2 uptake drops to near zero. Running CO2 during the dark period is a direct waste of gas. Always tie your CO2 delivery to your lights-on schedule via a timer or controller.
Adding CO2 to Fix a Light Problem
If yields are disappointing and lights are underpowered, adding CO2 won’t fix it. CO2 is a multiplier for photosynthesis — it amplifies what light is already doing, not what light is failing to do. Upgrade lighting before investing in CO2.
Overshooting the Target PPM
More is not better above 1,500 ppm for most crops. At concentrations above 2,000 ppm, stomata begin to close as a stress response, and photosynthesis actually drops. Some experienced growers push to 1,500 ppm under very high light with excellent results; pushing beyond that with no corresponding increase in light intensity is wasted gas and potential plant stress.
Ignoring Safety
CO2 is invisible, odourless at typical grow room concentrations, and heavier than air. Levels above 5,000 ppm cause headaches and impaired judgement; very high concentrations can render a person unconscious before they realise anything is wrong. Never enter a sealed grow room mid-injection cycle without first turning off the CO2 supply and waiting for levels to normalise. A CO2 monitor is not optional if you’re running enrichment seriously—it’s basic safety equipment.
Not Accounting for Leaks When Calculating
Real grow rooms aren’t perfectly sealed. Tent zips, passive intake holes, and door gaps all allow CO2 to escape. Your actual CO2 consumption will be higher than your theoretical calculation. Budget for 20–30% additional CO2 beyond the calculated minimum, and monitor actual ppm levels with a sensor rather than assuming your calculations are perfectly accurate in practice.
A Step-by-Step Guide to Setting Up CO2 in Your Grow Room
Getting the setup right from the beginning avoids most of the common frustrations.
- Confirm your lighting qualifies. Check PPFD at the canopy. If you’re not consistently above 600 µmol/m²/s, address lighting first.
- Calculate your room volume. Length × width × height. Write it down—you’ll use it for every CO2 calculation.
- Set your target ppm. Start at 1,000 ppm and move up to 1,200–1,500 ppm once you’ve confirmed your environment is stable.
- Calculate CO2 needed and flow rate using the formula above, or use the CO2 Calculator to get the numbers in seconds.
- Choose your delivery method. Compressed tank for most home grows. Size the cylinder based on your calculated daily CO2 requirement and how often you want to refill.
- Set distribution above the canopy. Position tubing or diffuser at or slightly above plant height, not at the ceiling or floor.
- Run a circulation fan. Keep CO2 moving through the canopy rather than pooling in one area.
- Tie CO2 to your light timer. CO2 on when lights come on; CO2 off when lights go off.
- Install a CO2 monitor. Verify you’re hitting target levels and not overshooting. Adjust flow rate accordingly.
- Monitor temperature and humidity. Expect both to shift when you start enrichment. Be ready to adjust your climate management setup.
Frequently Asked Questions About CO2 in the Grow Room
What is the ideal CO2 level for grow rooms?
For most indoor crops under adequate lighting, a target of 1,000–1,500 ppm during the lights-on period is the practical optimal range. Vegetative plants do well toward the lower end; flowering plants under high-output lighting can use 1,200–1,500 ppm effectively. Going above 1,500 ppm offers diminishing returns for the majority of setups.
Do I need to add CO2 to my grow room?
Not necessarily. If your grow room has regular air exchange—intake and exhaust fans running—CO₂ levels are being passively maintained close to atmospheric (around 400 ppm), which is sufficient for normal growth. CO2 enrichment is most valuable in sealed environments where CO₂ depletion is a real issue and where light intensity is high enough for plants to benefit from elevated CO2.
How do I calculate how much CO2 my grow room needs?
Use the formula: CO2 needed = (Target ppm − Current ppm) ÷ 1,000,000 × Room volume. Or use the CO2 Calculator, which does the calculation instantly and also gives you the recommended flow rate based on your preferred delivery window.
Is CO2 enrichment safe for home growers?
Yes, with proper precautions. The risks come from operating in a sealed space during CO2 injection without monitoring. Use a CO2 meter, never enter the room while actively injecting, and always ensure you can ventilate quickly if needed. For most home grows using a single compressed tank with a timed regulator, the setup is safe and controllable.
When should I turn off CO2 in the grow cycle?
Most growers stop CO2 enrichment one to two weeks before the end of flower (harvest flush period). At that stage, plant metabolism is slowing, and the cost of continued CO2 supplementation rarely returns value. During seedling stage, CO2 enrichment is generally not recommended—young plants with underdeveloped root systems can’t process the higher inputs.
CO2 Is a Multiplier, Not a Fix
CO2 enrichment is one of the most effective tools available to serious indoor growers — but it works in proportion to how well everything else in the grow room is already running. Get light intensity, nutrient delivery, temperature, humidity, and VPD right first. Then add CO2 and watch growth rates climb.
The calculation side of it doesn’t need to be complicated. Know your room volume, set a realistic target ppm, and control delivery gradually through the lights-on period. Everything else follows from there.
If you want the numbers without the maths, the free CO₂ calculator at Grow With Hydroponics gives you the total CO₂ required and the recommended flow rate based on your specific room dimensions and targets. Use it as a starting point, verify with a CO2 monitor, and adjust from there.