
Indoor LED Grow Light Setup Mistakes: Fix Coverage & Height Fast
The light arrives. You unbox it, hang it somewhere that feels about right, switch it on, and wait. Three weeks later the seedlings are pale and leggy, or the tomato tops are bleached white, or half the tray is noticeably darker than the other half. You blame the light. The light, almost certainly, is not the problem.
Most indoor growing failures tied to lighting aren’t equipment failures—they’re setup failures.
Wrong height. Mismatched coverage. No understanding of what PPFD or DLI actually means for the crop in front of you. The indoor LED plant grow light hanging on your ceiling might be perfectly capable. It’s just not being used correctly. At Grow With Hydroponics, we’ve tracked this pattern across hundreds of setups, and it always starts the same way: a grower trusted their instincts instead of the numbers.
This guide covers the metrics that actually matter, the setup decisions that make or break a grow, the most common mistakes beginners make, and how to fix all of it fast.
The Ultimate LED Grow Light Guide: Science-Backed Indoor Setup (2026): a comprehensive deep dive on LED grow light science, spectrum, fixture types, and full setup principles for indoor growers.
The Language Your Indoor LED Plant Grow Light Actually Speaks
Before you adjust anything, you need to stop thinking in watts and lumens. Watts tell you what the fixture costs to run. Lumens tell you what it looks like to human eyes. Neither tells you what’s hitting your plant canopy. Three metrics do.
PAR — The Spectral Range That Counts
PAR (Photosynthetically Active Radiation) covers the 400–700 nanometre wavelength range that plants can actually use for photosynthesis. Think of it as the grocery aisle. It tells you the category of light — not how much of it is landing on the leaf.
PPFD — The Diagnostic Number
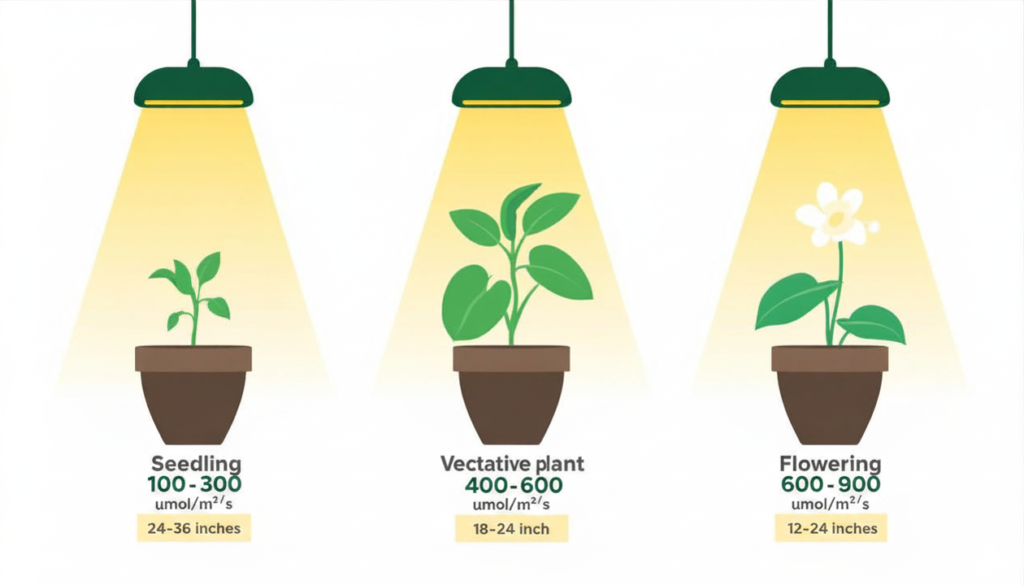
PPFD (Photosynthetic Photon Flux Density), measured in µmol/m²/s, tells you the intensity of usable photons hitting a specific point on the canopy right now. This is the single most practical diagnostic number in indoor growing. In the seedling stage, a recommended PPFD of 100–300 µmol/m²/s avoids excessive intensity that could harm seedlings. During the vegetative stage, 400–600 µmol/m²/s promotes healthy growth. In the flowering stage, 600–900 µmol/m²/s enhances production and increases yields.
If a manufacturer doesn’t publish a PPFD map — a grid showing intensity values across the fixture’s footprint at a stated height — they’re not giving you the information you need to set up correctly. Walk away.
DLI — The Daily Production Budget
DLI (Daily Light Integral) is the total photon dose delivered over a full day, calculated as PPFD multiplied by photoperiod hours. A fixture delivering 800 µmol/m²/s under a 12-hour flowering photoperiod produces a DLI of approximately 34.6 mol/m²/day. Herbs and leafy greens need a modest DLI of around 12–17. Fruiting crops want 25–35. Running the numbers with our DLI Calculator before you hang anything is the fastest way to confirm your fixture and photoperiod will actually hit your crop’s target.
Why Full-Spectrum White Light Is the Right Default Choice
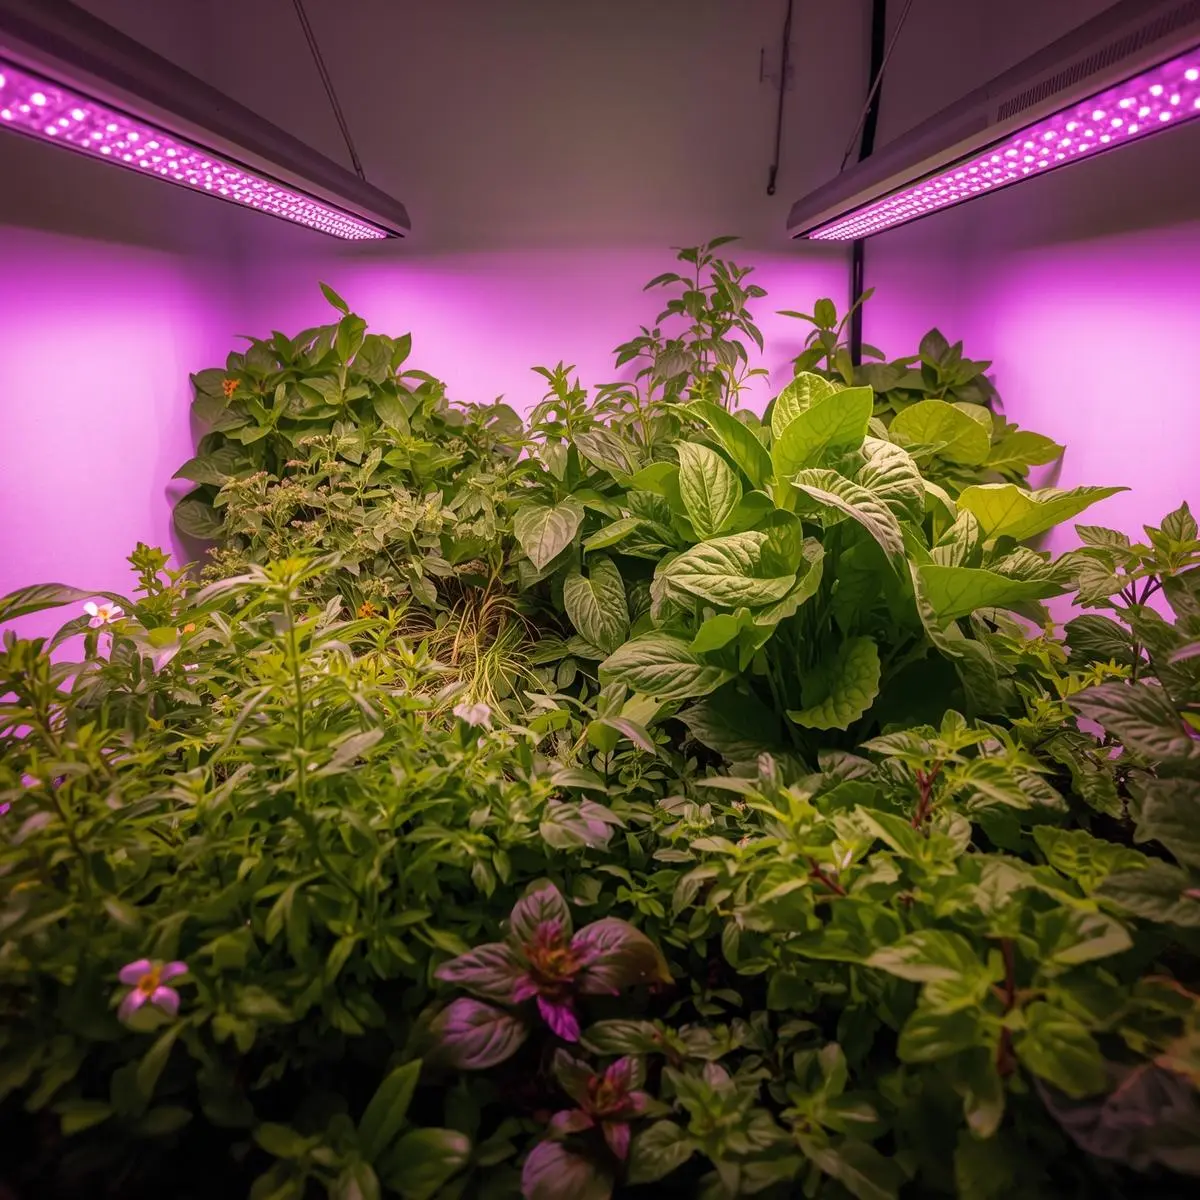
The blurple era is over. Red-and-blue-only LED panels were an early attempt at delivering PAR efficiently — they worked, but they created serious practical problems. LED grow lights sold as “full spectrum” are ideal for both the vegetative and flowering stages, and quality full-spectrum LEDs include all essential wavelengths, making them ideal for gardeners growing multiple plant types or those who don’t want to constantly adjust settings.
Full-spectrum white light also matters for practical grow-room management. Under a red-blue blurple panel, you genuinely cannot see leaf colour accurately. Pale leaves look purple. Early yellowing disappears into the glow. Pest damage is invisible until it’s well-established. A full-spectrum fixture that looks close to daylight lets you actually see what’s happening to your plants—and that observation is what keeps a grow healthy.
For most indoor growers, full-spectrum white LED with targeted red enhancement across the canopy is the right starting point and often the permanent choice.
Here’s a precise placement map for every relevant shortcode—showing exactly where in the article each goes, what CTA text wraps it, and why it belongs there.
Shop Expert-Picked LED Grow Lights
Not sure which fixture is right for your space? Every light below has been selected for verified PPFD output, dimmable range, and real growing performance — not just box claims.


Before you buy, run your intended fixture through our DLI Calculator to confirm it delivers your crop’s daily light target at your planned hanging height.
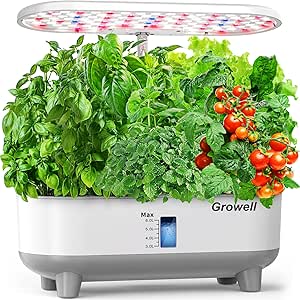
How to Get Coverage Right for Your Indoor LED Plant Grow Light
Coverage claims on LED packaging are consistently optimistic. A light rated for a “4×4 ft area” is often delivering adequate PPFD only across the central 2×3 ft at the stated hanging height, with significant dropoff toward the edges.
The most common sizing mistake is using full room dimensions as the input.
Your room’s walls and walkways don’t photosynthesize.
What matters is the actual surface area your plant canopy occupies — and this number is often significantly smaller than the room footprint.
Measure the canopy footprint, not the room. Then match that footprint to your fixture’s PPFD map at your intended hanging height. Single light fixtures create hotspots directly underneath while leaving peripheral areas underlit—plants in the centre grow beautifully while edge plants become stunted and weak. This is especially common in larger growing spaces where growers try to cover too much area with too few lights.
When you Shop Smart for an LED fixture, prioritise verified PPFD maps over marketing coverage claims. A fixture with published grid data at multiple hanging heights is one you can actually work with. One without it is a guess.
Practical coverage starting points:
- 2×2 ft: ideal for herbs, small greens, propagation
- 3×3 ft: serious herb production or a single fruiting plant
- 4×4 ft: the versatile home grower sweet spot
- 4×8 ft: bar-style fixtures significantly outperform panel designs here for coverage uniformity
Shop Grow Tents—Matched to Your Footprint
Choosing the right tent size is the first coverage decision you make. These picks cover every common footprint—from compact 2×2 herb setups to full 4×8 production spaces.


Height is where the most damage happens — in both directions.
Avoid mounting LEDs too high, or the light intensity at canopy level will be reduced significantly. Avoid mounting too low, or you may cause light stress, bleaching, or heat stress near the diodes. The inverse square law governs this: double the distance and PPFD drops to approximately a quarter of its original value. Small height adjustments have large consequences.
Seedlings and Cuttings — Start High, Stay Gentle
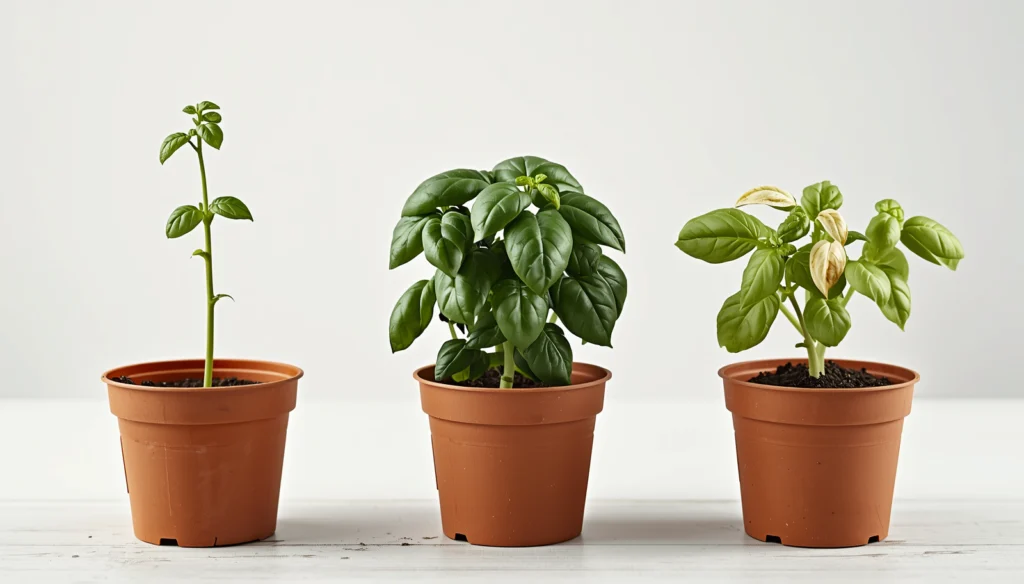
Seedlings’ cotyledons lack the protective wax cuticle that mature leaves develop, so high PPFD bleaches them white and stunts growth. Too little PPFD triggers etiolation—the plant stretches upward hunting for brighter light it cannot find, producing thin, weak stems that collapse at transplant.
Use a PPFD level between 200 and 400 µmol/m²/s for seedlings, consulting your light’s PAR chart to find the exact height that delivers this intensity to the canopy. For most fixtures, that’s 24–36 inches above the seedling tray. If your light is dimmable—and it should be—set it to 25–40% output at a consistent distance rather than varying the height constantly.
Changing distance forces the plant to re-adapt to a new light angle and coverage. Dimming keeps the LED position static while scaling intensity—producing smoother transitions and less plant stress. Learn to use the dimmer as your primary adjustment tool.
Vegetative Stage — Build the Engine
During the vegetative stage, a PPFD of 400–600 µmol/m²/s is recommended, with adequate blue light to promote healthy leaf, branch, and stem growth. For most fixtures, this means bringing the light to 18–24 inches above the canopy. Gradually ramp intensity as the plant establishes — don’t jump from seedling PPFD to full vegetative intensity in one step.
When LED grow lights are too far away during vegetative growth, plants stretch as much as possible to get closer to the source. The result is tall, lanky, thin stems which prevent the lower canopy from receiving enough light to develop well.
Watch node spacing. Short, tight nodes mean the plant is well-lit. Long gaps between nodes mean the light is too far, too dim, or both.
Flowering and Fruiting — Dial Up, Watch Closely
Changing your light schedule to 12/12 triggers flowering. At this point, you can increase PPFD to 800–1,000 µmol/m²/s. For fruiting crops like tomatoes and peppers, most fixtures land at 12–18 inches at this intensity on full or near-full output.
During the stretch phase, plants can grow 4–6 inches per week—raise the LED at least that much to avoid canopy burn. The floor is determined by your tent temperature and the LED’s heat output.
One important point that beginners miss: higher PPFD increases water and nutrient demand. The plant will show stress if the root zone can’t keep up with increased light-driven transpiration and photosynthesis. When you increase light intensity, check that your feeding and irrigation frequency match the plant’s new energy output.
The Seven Most Common Indoor LED Plant Grow Light Setup Mistakes
Getting these wrong is almost universal among beginners. Getting them right is straightforward.
| Mistake | What Happens | The Fix |
|---|---|---|
| Hanging too high | Stretching, leggy stems, wide node gaps | Lower light to target PPFD; use PPFD map |
| Hanging too low | Bleaching, taco-curl leaves, burnt tips | Raise the fixture and reduce dimmer output |
| Measuring room not canopy | Undersized light for actual plant footprint | Measure canopy area and match to PPFD map |
| Ignoring PPFD map | Hotspots in the center, dark edges | Check edge PPFD, not just centre reading |
| Static height across growth stages | Wrong intensity for crop stage | Adjust height or dimmer as plants develop |
| Skipping DLI calculation | Inconsistent results, no repeatable baseline | Calculate DLI target and set photoperiod accordingly |
| Not adjusting after canopy height changes | Effective PPFD drops as plants grow | Check and adjust canopy-to-fixture distance regularly |
Advanced Setup Tips for Getting More from Your Indoor LED Plant Grow Light
Use a dimmer as your primary tool, not height adjustment. Set height based on growth stage, then use the dimmer to fine-tune PPFD. For seedlings, hang at 24 inches and run at 40% intensity. As plants mature, raise intensity incrementally to 60%, then 80%, then 100%. Distance stays constant—intensity ramps with growth.
Check canopy height against light height weekly during flowering. Fast-growing fruiting plants change position quickly. What was 18 inches of clearance on Monday might be 12 inches by Friday if you’re not watching.
Reflective walls extend effective coverage. White or Mylar-lined walls bounce stray photons back into the canopy, improving edge PPFD without moving the fixture. This is particularly useful in smaller grow tents where wall proximity helps.
Run the hand test when you don’t have a PAR meter. Hold the back of your hand at canopy level for 60 seconds. Just warm is correct. Uncomfortably hot means raise the light. Can’t feel anything means lower it or increase output.
Track DLI over time. Tracking DLI over time lets you compare batches, refine schedules, and reduce losses. This measurement-first approach is consistent with how greenhouse and indoor crop specialists manage light for predictable outcomes. Use our DLI Calculator to set your baseline at the start of each grow cycle.
Understanding PPFD and spectrum for indoor grow lights—a supporting guide on full-spectrum LED selection, PPFD explained, and DLI targets by crop type.
Frequently Asked Questions About Indoor LED Plant Grow Light Setup
How do I know if my indoor LED grow light is too close to my plants? When a fixture is too close, plants may show scorched or bleached tissue, abnormal discolouration, or overly compact growth that slows development. These symptoms are common in indoor setups where intensity ramps too quickly. Raise the light in 2-inch increments, wait 48 hours, and observe. If the bleaching doesn’t progress, the new height is probably correct.
What’s the best hanging height for LED grow lights during the seedling stage? Target 200–400 µmol/m²/s PPFD for seedlings by consulting your light’s PAR chart to find the exact height that delivers this intensity to the canopy. For most standard fixtures, that’s 24–36 inches. If your light is dimmable, keep height consistent and reduce output to 25–40% rather than adjusting position constantly
Can I use one LED fixture for my whole grow tent? It depends on the tent size and fixture output. Don’t try to stretch a light’s effective coverage area beyond its PPFD map—most quality grow lights specify their effective coverage area, and exceeding it leaves edge plants starved while centre plants receive full intensity. For a 4×4 tent, use a fixture specified for that footprint. For 4×8, use two fixtures or a bar-style light designed for that coverage.
Why are my plants stretching even though I have an LED light? Stretching, thin stems, and large gaps between nodes often indicate insufficient PPFD or poor edge coverage. This is common when a fixture is hung too high or when the footprint is too small for the growing area. Lower the fixture toward your PPFD target for the growth stage or increase dimmer output if height is already appropriate.
Does increasing light intensity mean I need to feed my plants more? Yes. Higher PPFD increases water and nutrient demand. Plants will show stress if the root zone can’t keep up with the increased energy demands of higher-intensity photosynthesis. When you step up light intensity—particularly into the flowering stage—increase feeding frequency alongside it, not separately.
New to Indoor Growing? Start With a Complete Kit
If you’re setting up your first indoor system, a quality growing kit removes the component guesswork and gets you growing faster. Every option below includes the essentials to pair with your LED setup.


Set It Up Once. Get It Right.
The light hanging above your plants is only as useful as the setup around it. Get the height wrong and you’re either stressing the canopy or starving it. Get the coverage wrong and half your grow is underperforming while the centre burns. Get the DLI wrong and your crop cycle will never be consistent enough to repeat.
None of it is complicated once you understand what the numbers mean. PPFD is the intensity your plant is receiving right now. DLI is the daily total. Hanging height and dimmer output are the two variables that control both. Adjust from there based on what the plants tell you—and they’ll tell you clearly if you know what to look for.
At Grow With Hydroponics, the tools to make this precise are already built: Use the DLI Calculator to verify your setup before the first seed goes in, and browse expert-tested LED fixtures through Shop Smart when you’re ready to upgrade or build out a new space.
A well-set-up indoor LED plant grow light turns a capable fixture into a consistent producer. That’s the whole point.