
Let’s be honest: growing roses hydroponically is equal parts thrill and mild terror. You begin with a hopeful stick in water, things seem fine for a week, and then—the first yellow leaf appears. Your stomach drops. Is it dying, or is this just… what roses do?
That panic is universal. It’s also mostly unnecessary. Roses don’t operate on mystery; they follow a strict, biological script. Once you learn the lines, you stop reacting to every sigh the plant makes and start supporting its natural rhythm.
At Grow With Hydroponics, we’ve found that 90% of “problems” are just a grower misreading the stage. This isn’t about having a green thumb—it’s about having a roadmap.
Consider this your map. We’re walking through each hydroponic rose growth stage, from that initial cutting to the moment you lean in to smell your first bloom. I’ll tell you what to expect, what to feed, and how to spot the difference between a minor hiccup and a real crisis.
Why Bother Learning Hydroponic Rose Growth Stages?
Because time is your most valuable resource, and guessing wastes it. Roses are perennial plants; in hydroponics, we just speed up the soundtrack. Knowing the stage means:
You tweak nutrients precisely when the plant is ready—not when your anxiety peaks.
You don’t “fix” a perfectly normal pause in growth.
You spot legitimate trouble (a fungus, a lockout) days before it becomes a catastrophe.
You prune, train, and adjust your environment with purpose, not hope.
In short, stages turn emotion into strategy.
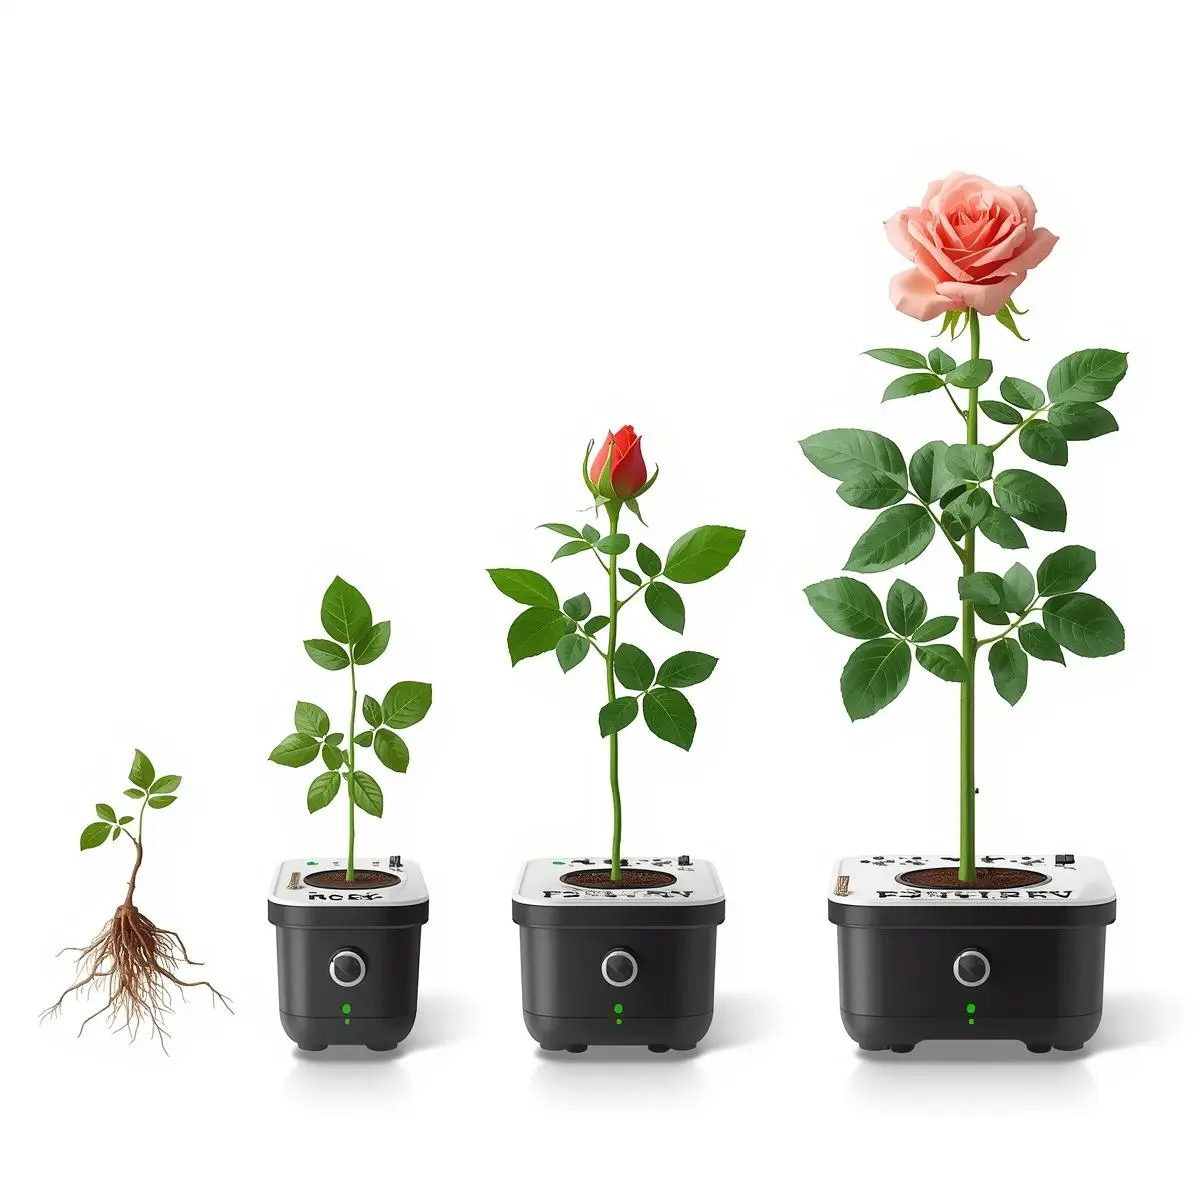
Overview: Hydroponic Rose Growth Stages at a Glance
Here’s the lifecycle, stripped to its essentials:
Cutting & Callus Formation
Root Initiation
Early Vegetative Growth
Structural (Cane & Leaf) Development
Bud Initiation
Bud Expansion & Color Set
Full Bloom & Maintenance
Each phase has its own personality, its own needs, and its own quiet way of telling you you’re on track.
Stage 1: Cutting & Callus Formation (Days 0–10)
This is the quiet part. You’ve taken your cutting, dipped it, and placed it in the system. Nothing happens. That’s the point.
What’s Actually Happening: The plant is sealing its wound. A callus—a knobby, protective tissue—forms at the base. Inside, cells are reorganizing, preparing for the monumental task of building roots from scratch. There is no uptake yet.
What You Should See: Absolutely nothing above the node. The leaves might droop slightly from the shock. The stem should stay firm and green. Your job is to wait.
The Hydroponic Sweet Spot:
pH: 5.8–6.2
EC: 0.4–0.6 (a whisper of nutrients, if any)
Environment: High humidity (70-80%), indirect light, peace and quiet.
The Pro Insight: This is where beginners drown their cuttings in kindness—usually via nutrients. Hold back. If you’re mixing a trace solution, lean on our EC ↔ PPM Converter for clarity. It keeps you honest when overzealousness tempts you.
Sound the Alarm If: The stem softens or turns brown. Leaves turn crispy or melt into slime. A foul smell arises. This is rot, not patience.
Stage 2: Root Initiation (Days 7–21)
The first real victory. It’s a quiet one.
What’s Actually Happening: Hormones rally, and those callused cells differentiate into root initials. Then, you see them: tiny, fragile, brilliant white nubs seeking water and oxygen.
What You’ll Notice: Those white tips. The existing leaves will perk up, feeling firm. You might see the tiniest hint of green at a node.
The Hydroponic Edge: This is why we do this. A well-oxygenated root zone in a hydroponic system is a root-creation powerhouse. Keep temperatures stable (20-24°C) and gently nudge EC to 0.6-1.0.
Sound the Alarm If: The nubs are brown or translucent. A slimy film develops. Three weeks pass with zero activity. This screams low dissolved oxygen or contamination.
Stage 3: Early Vegetative Growth (Weeks 3–5)
Now we’re gardening. The plant, confident in its roots, looks upward.
What’s Actually Happening: Photosynthesis kicks into gear. The plant’s sole mission is to create leaf surface area—the engines for all future growth. You’ll get new, soft stems and bright green leaves.
The Nutrient Shift: Nitrogen becomes the headliner for leaf production, supported by magnesium (the core of chlorophyll) and calcium for strong cell walls. Don’t guess the ratios. Our Nutrient Calculator removes the drama and matches strength to demand.
Light & Layout: 12-14 hours of moderate light. And a planning tip: if you’re starting multiple varieties, use the Grow Space Planner now. Giving each plant room for air and light prevents a jungle of problems later.
Sound the Alarm If: New leaves are pale (nitrogen/iron), curled (calcium), or show interveinal yellowing (magnesium). Don’t just dump in Cal-Mag—diagnose. The Plant Health Diagnosis Tool is your first responder here.
Stage 4: Structural Growth (Weeks 5–8)
The plant stops being a seedling and starts being a shrub.
What’s Actually Happening: Energy shifts from “grow tall” to “grow strong.” Stems thicken into canes. Internodes space out properly. Lateral branches form. This is architecture.
Healthy Signs: Sturdy canes that don’t flop. Multiple growth points. Deep, robust leaf color.
The Critical Balance: This is where your climate management earns its keep. High humidity with low temps makes for soft, weak growth. It’s all about Vapor Pressure Deficit (VPD)—the relationship between temperature and humidity that drives transpiration. Ignore it, and your structure suffers. Our VPD Calculator is the tool I wish I’d had a decade ago.
Sound the Alarm If: Stems are long, thin, and weak (“leggy”). Leaves feel brittle. You’ve likely got a climate or calcium uptake issue.
Stage 5: Bud Initiation (Weeks 8–10)
The plot thickens. The plant gets a new directive: reproduce.
What’s Actually Happening: A hormonal switch flips. The apical meristems change from producing leaf nodes to forming flower buds. Vertical growth slows. You’ll see tiny, green, rounded formations at the shoot tips.
The Subtle Art of Feeding: This is the most common tripwire. You must ease off nitrogen and increase potassium and phosphorus. Keeping a vegetative diet will give you a beautiful, bushy, bloomless rose. Frankly, this is where most beginners go wrong.
Lighting the Fuse: 14-16 hours of high, consistent light intensity is non-negotiable.
Shop Smart: If you’re eyeing a new grow light for this phase, pair the purchase with our DLI Calculator. You’re buying photons for bud formation, not just a bright rectangle for your tent.
Sound the Alarm If: Buds form and then abort or drop. This is classic stress—often from an EC spike or a wild VPD swing. If you see no buds at all by week 10, your light or nutrient balance is off.
Stage 6: Bud Expansion & Color Development (Weeks 10–12)
The commitment phase. The plant is all-in on this bloom.
What’s Actually Happening: Petal cells rapidly expand with water and nutrients. Pigments (anthocyanins) and aromatic oils develop. The bud swells, and color bleeds through the sepals.
The Home Stretch: Keep everything stable. A slight drop in night temperature can intensify color. Hold humidity at 55-65% to prevent petal tip burn.
For the Advanced Grower: This is the stage where controlled CO₂ enrichment can maximize bloom size and vitality—if your environment is already locked in. The CO₂ Calculator helps you navigate the delicate math without gassing your plants (or yourself).
Sound the Alarm If: Buds are distorted or lopsided (often boron/calcium). Color develops unevenly or fades (potassium). Act fast—the bloom window is narrow.
Stage 7: Full Bloom & Maintenance
You made it. Take a picture. Smell it. This is the reward.
What’s Actually Happening: The rose is in full display, but biologically, it’s already planning the next cycle. It will direct energy to maintaining this bloom while initiating new growth points for the next.
Post-Bloom Protocol: Deadhead spent flowers promptly to redirect energy. Maintain a higher EC (2.0-2.4) for the effort of reblooming. Avoid any dramatic environmental shifts—consistency is key now. The beauty of hydroponics is the speed of the next bloom cycle when you get this right.
Juggling Act: Running a mix of teas, grandifloras, and miniatures? The Multi-Crop Planner is indispensable for staggering feeds and lights so everyone gets what they need.
The Stalled Rose: Why It Happens Between Stages
When growth just… stops, it’s almost always one of three culprits, in this order:
The light isn’t right for the stage (too much or too little).
The nutrient profile is out of sync (feeding for leaves during bud stage).
Temperature and humidity are fighting each other (a VPD nightmare).
This is why we test before we commit. The Grow Space Simulator lets you model these variables. It’s cheaper than a lost crop.
Deepen Your Knowledge
This guide gives you the when and why. To build out the how, explore our deeper dives:
For the full, science-backed journey, start with our pillar guide:How to Grow Roses Hydroponically: Science-Backed Complete Guide (2026).
Troubleshooting in the flowering stage? See Plant Health Diagnosis Tool .
Dialing in your environment is key. Our guide on Best Lighting Strategies for Indoor Blooming Plants
The Rhythm of Growth
Hydroponic roses aren’t cryptic. They’re communicative. Every pale leaf, every sturdy cane, every swelling bud is a sentence in a long story. Learn the language of their stages, and you stop being a nervous bystander. You become a conductor.
The community and resources at Grow With Hydroponics are built on that principle. Confidence doesn’t come from a perfect grow—it comes from knowing exactly what’s happening in your system, and why.
Your next step? Go look at your plant. Really look. Identify its stage. Then, do only what that stage requires. Nothing more. That’s the secret.
FAQ: Hydroponic Rose Growth Stages
My rose cutting hasn’t rooted in 3 weeks. Is it dead?
Probably. After 21 days with no white root nubs and a stem that’s still firm, it’s in stasis. If it’s soft or brown, it’s a loss. The most common culprits are low dissolved oxygen in your reservoir or a cutting taken from unhealthy wood. Start over, and ensure your cloner or propagation medium is oxygen-rich.
Can I speed up the stages with more light or nutrients?
No. You can optimize them, but you can’t brute-force biology. Pushing high EC in the callus stage will rot your cutting. Blasting a vegetative plant with 18-hour light won’t trigger buds—it will just stress it. Think of it like a pregnancy: you can ensure perfect health, but you can’t rush the trimesters.
Why are my buds falling off before they open (Bud Blast)?
This is almost always an environmental stress event during Stage 5 or 6. A sudden spike in EC, a drastic swing in temperature/humidity (bad VPD), or root zone issues (like ph instability) will cause the plant to abort the energy-intensive bloom. Stability is more important than perfection.
What’s the one tool you’d recommend for a first-time rose grower?
A good pH/EC meter and the discipline to use it. But for strategic planning, the VPD Calculator. Managing the temperature-humidity relationship is the invisible hand that shapes everything from stem strength to bud set. Most grow room problems are climate problems in disguise.
How long from cutting to first bloom in hydroponics?
With optimal conditions, you can see a first bloom in 12-14 weeks. Soil-grown roses often take 5-6 months for the same cycle. The hydroponic advantage is consistency and root zone oxygen, not magic.
My plant is lush and green but won’t form buds. What gives?
You’ve got a vegetative-stage plant stuck in a vegetative mindset. You’re likely giving too much nitrogen and/or not enough light intensity/photoperiod to trigger the flowering hormone (florigen). Reduce nitrogen, ensure at least 14 hours of strong light, and be patient. It’s a hormonal cue, not a nutrient one.
Are these stages the same for all rose varieties?
The sequence is universal. The timing and some specifics (ideal EC, light sensitivity) can vary. A vigorous climbing rose will spend longer in structural growth than a miniature. This is where the Multi-Crop Planner becomes essential if you’re running a mixed garden.
When should I prune my hydroponic rose?
Primary structural pruning happens when the plant is dormant—less relevant in a perpetual indoor setup. For maintenance, prune after a bloom cycle (Stage 7) to shape the plant and encourage new breaks, which will become your next flowering stems. Never remove more than 1/3 of the plant’s mass at once.
Can I use these stages for soil-grown roses?
The biological stages are identical. The difference is in your control and the speed of the feedback loop. In soil, a nutrient change takes days to manifest. In hydroponics, the plant reacts within hours. The stages are the map, but the vehicle is different.
Dr. Awais Yousaf
Algorithm Specialist and Associate Professor leading R&D at Grow With Hydroponics. With 5+ years of hands-on experience in smart hydroponic systems, deep learning, and sustainable AgriTech, he is passionate about turning small spaces into high-yield indoor farms. Connect at awais.yousaf@iub.edu.pk